Common Hiking Injuries:
Don't Be A Statistic
By Diane Spicer
Some hiking injuries come with the territory.
That's why you need to be prepared to face them, surmount them, and sometimes help other injured hikers on the trail.
You're in the right place!
This page gets you up to speed, and then gives you some options to avoid getting hurt on a hike or backpacking trip.
- To read more about preventing hiking injuries to your back, legs, neck, and knees, read this.
- If you're interested in hiking illness avoidance strategies, go here.
Typical hiking injuries: let's make a list
Let's start by listing common injuries which hikers face, whether on a day hike or a lengthy backpacking trip.
1. General soft tissue injury: cuts, abrasions, bruises, rashes, burns, stings, bites, chafing, blisters and other types of wounds with or without bleeding
2. Temperature related injury: dehydration, heat stroke, hypothermia, frost bite
3. Muscle and joint problems: sprains, strains, pulled muscles
4. Overuse injuries: tendonitis, bursitis, exhaustion
5. Bones: broken, dislocated, bruised, stress fractures
The list is based on a report from the National Outdoor Leadership School (NOLS).
What can you do to keep yourself off this list of hiking injuries?
Keep reading, for starters.
Soft tissue hiking injuries:
avoidance strategies
Any time you take a hike, you are going to bump, scrape and bruise yourself.
Insect bites are also to be expected.
But let's take a look at some preventive strategies to minimize your chances of other types of soft tissue injury.
Hiking injuries: blisters
This topic has been covered in depth here:
- blister prevention
- blister treatment
Top tips to avoid blisters:
- Get your hiking sock + footwear combination just right.
- Take off your boots or trail shoes and air out your feet several times a day, or at least once mid-way through a day hike.
- Stop immediately to address any hot spots on your feet. No kidding, don't take one extra step without investigating the problem.
- Invest in special anti blister socks like ArmaSkin. Read my review here.
Hiking injuries: hiker's rash
You'll know this one when you see it: hikers rash is red patches and bumps on your leg and ankle region, made even more fun by itchiness or pain.
Maybe even a little swelling, if you're extra lucky.
It will fade with time, but can linger for weeks.
The medical term for this is exercise-induced vasculitis (EIV).
All that means is you've got increased blood flow to your lower legs (because you're hiking) which for some reason has caused the blood vessels to become inflamed ("-itis" always refers to inflammation).
What to do about it?
Sorry to tell you, but once you're in the thick of it, there's not much to be done except to rest and elevate your legs to encourage blood flow to and from the area.
Compression hiking socks may help to prevent it from happening again.
And here's something to ponder: this condition is most common in older hikers and those with decreased circulation (diabetics).
So if hiker's rash has paid you a visit, get checked out by your health care provider and discuss ways to improve your circulation.
Lots more tips (and why it's sometimes called Disney rash) here.
Hiking injuries: skin chafing
You might not have paid much attention to what your skin does for you. silently, day in and day out.
But you will when it become irritated and broken, especially in your groin area or beneath your breasts.
- Hot, sweaty skin rubbing against your clothing sets you up for chafing.
- Chafing can lead to broken, painful areas that are hard to heal if they become large.
Here are some evasive actions to take.
Clothing tips to prevent hiking injuries
- Wear hiking clothing (especially underwear) that is moisture absorbent yet breathable. You want sweat to be directed away from your skin, and your body heat and moisture to get out of the fabric.
- Find high quality hiking clothing using these tips.
- Ditto for the right sports bra for hiking.
- Swap out your sweaty clothing half way through the day for dry, hopefully cleaner, versions.
- Keep your skin covered with long sleeves, long pants, neck gaiters and a hat.
Proactive behaviors to avoid hiking injuries
- Use an anti chafing product like Body Glide on areas prone to chafing: groin, armpits, cleavage, waistline, neck or buttocks.
- Carry a sweat mopping towel like this absorbent, fast drying one, and take a few moments every hour to create drier conditions on your body.
- Sunbathe any irritated areas of skin to help dry it out and begin to heal.
- Keep your skin clean, using a mild unscented soap like Dr. Bronners.
- Drink clean water at regular intervals to support your skin in its fast cell turn over and replacement cycles. Hiking hydration is one of your first lines of defense against injury.
Hiking injuries: burns
There are two common sources of burns for hikers:
- sunburn from ultraviolet radiation exposure
- skin exposure to boiling water and/or heat sources such as stoves or fires
Sun exposure
Avoiding sunburn takes some dedication to selecting the right sunscreen, and then applying it regularly.
If you're not a fan of sunscreens, given recent reports about its chemical ingredients reaching the bloodstream, then alter your behavior and use protective gear to keep ultraviolet radiation from frying your skin.
- Best hats for hikers
- UPF clothing choices for hikers
- An example of a sun blocking lip balm
- Sunglass choices
- Sunburn avoidance strategies
The best time to prevent damage is in the morning, by taking time to apply sunscreen just before you hit the trail.
The second best time?
When you re-apply sunscreen that has been sweated off, or don another layer of protective clothing when the sun is highest overhead.
Thermal burns as hiking injuries
At the end of a long trail day, you're in a hurry to get something hot and tasty into your body.
But take a moment to prepare your camp kitchen for safety.
- Make sure your backpacking stove is on a level spot, away from gear and clothing.
- Tell your hiking buddies when you're lighting the stove so they can avoid the area.
- When you pour hot water from the cooking pot, use a stable posture. Don't allow anyone to "help" you by holding whatever is receiving the water: a cup, bowl, or dehydrated food packet.
Read up on safe stove choices here.
Bleeding & wound care
Extensive blood loss is an emergency and must be controlled immediately.
- Direct pressure and elevation of the injury above the heart are your best options.
For this reason, your first aid kit should contain some sterile gauze pads.
Don't have a kit yet? Here's a good choice.
Have the injured hiker press the pad onto the wound if possible, while you assess the amount of bleeding and arrange the wound above heart level.
If you need to apply pressure without assistance, use your bandanna to hold the gauze in place.
- You don't want to restrict blood flow (as in a tourniquet), just buy some time for clotting to occur, so be sure loss of sensation isn't occurring.
Once blood loss has stopped, turn your attention to preventing infection by cleaning the wound.
- Flood the area with clean water.
- Remove any debris (stones, twigs, etc.) with tweezers (also in your 1st aid kit).
- Irrigate the area again.
- Apply antibiotic cream to a fresh gauze pad and fashion a secure wrapping.
If you're in the middle of a long trip, be sure to check the wound daily for signs of infection: extreme pain or redness, surrounding skin hot to the touch, pus.
Temperature related hiking injuries
The human body can withstand an impressive range of temperatures, given the right gear and trail smarts.
But any one of us can get into trouble when Mother Nature throws a tantrum our way.
Or we forget to double check the gear list.
We've already covered burns above.
Use these tips to maximize your safety from these problems related to temperature extremes:
- avoid dehydration
- hot weather hiking
- avoid heat related illness
- cold weather hiking
- avoid hypothermia
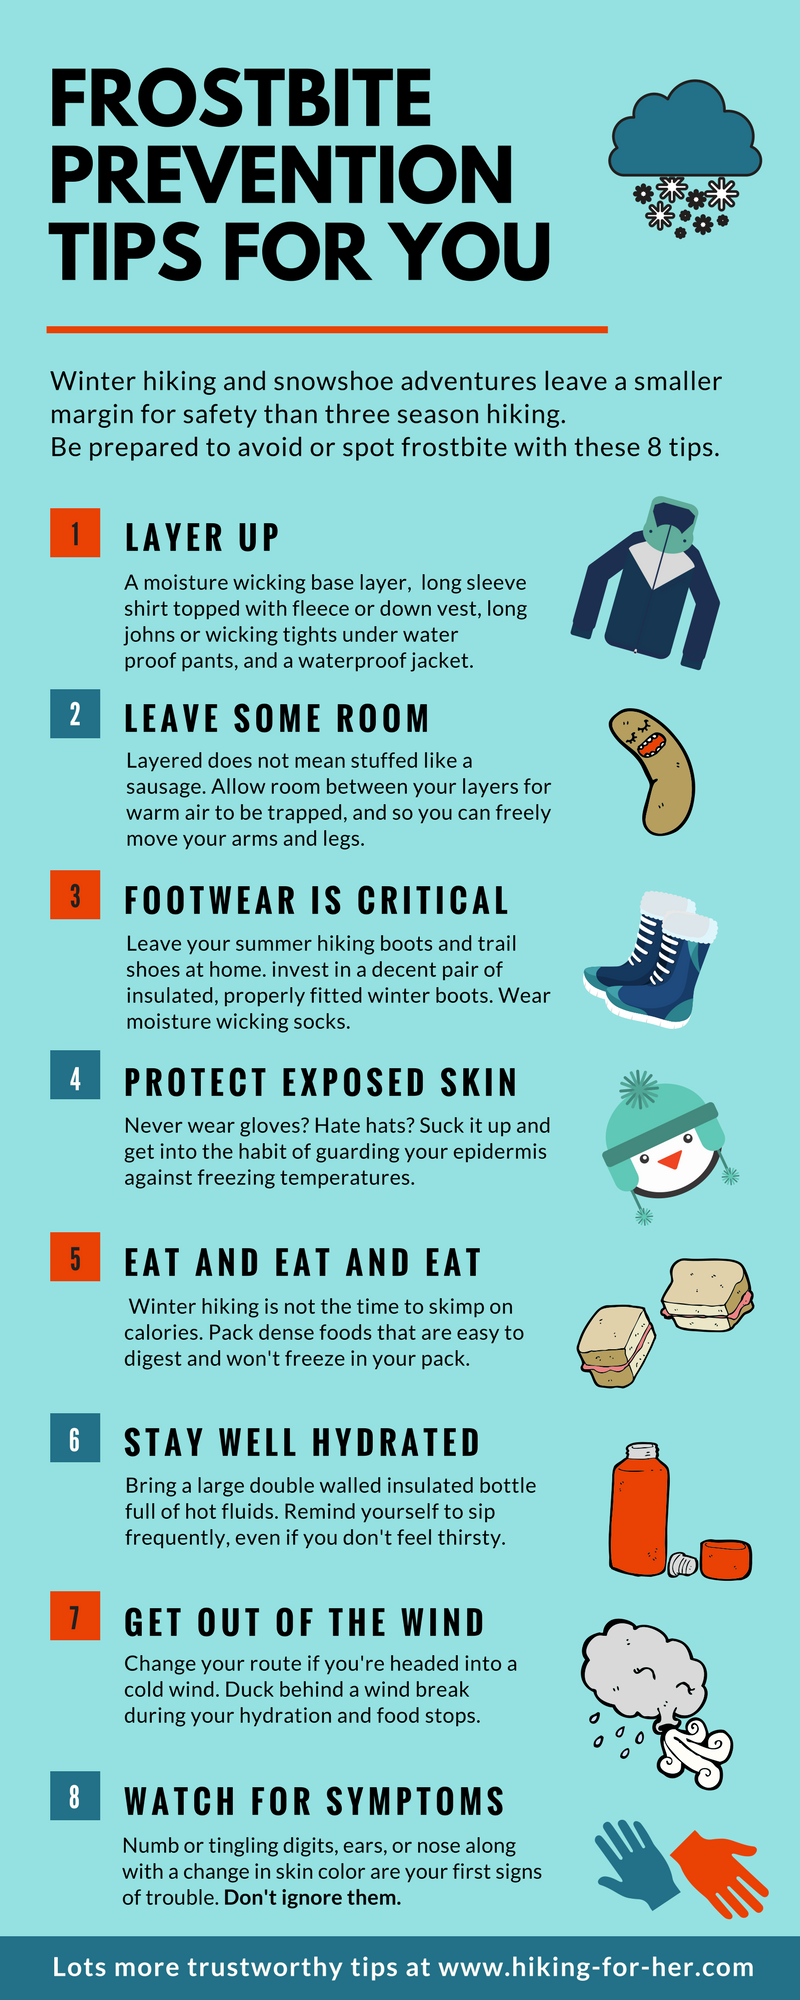
- frostbite prevention
Muscle and joint hiking injuries and issues
you may encounter
Every hiker has a particular body region that gets sore and feels tweaked on a hike.
For example, arch pain might be a recurring problem, even with supportive boots and cushion-y hiking socks, if you have high arches.
Use these tips to deal with your own troublesome spots:
Make it a regular habit to use a muscle massage roller stick like this one, or this trigger point stick, to banish soreness.
Read up on hiking inflammation for more self care tips.
Strain versus sprain:
what a hiker needs to know
Both of these terms refer to soft tissue damage somewhere near a joint in your body.
In medical terms, a sprain means that you've stretched or torn a ligament connecting bone to bone.
The same problem, but in a muscle or tendon (with connections to bone), means you have experienced a strain.
What does the difference mean to you on the trail?
- A sprain usually results when you've forced a joint past normal limits, as in stepping into an unseen deep hole and twisting your ankle.
- A strain points to overuse or repetitive motions, which any hiker can encounter when moving arms and legs in repetitive patterns on the trail.
In either case, focus on your pain level and stability to assess your situation.
If you can't bear weight on an ankle, or you need to pop several pain relief tablets just to be able to move a little, you've got a severe problem that won't go away overnight.
- Joint instability is dangerous for a hiker, especially when carrying a backpack on uneven ground.
- An intense level of pain may rob you of clear thinking and good judgement, but you'll know when you've had enough and need to be evacuated.
If you are in mild discomfort and can use the opposite leg (perhaps with a supportive hiking pole) to become mobile, use the RICE approach to deal with the inflammation.
Yes, you're going to have to stop hiking for a day or two, or turn around if the trailhead is close.
Suck up the disappointment and focus on this for the first 24 - 48 hours after the injury:
- Rest
- Ice (if possible)
- Compression
- Elevation
Overuse hiking injuries
Unless you're a professional hiker (now there's a great job description), you live with cycles of inactivity followed by hitting it hard when you have time to backpack or tackle an ambitious day hike on your day off.
This unfortunate pattern sets you up for problems with your soft tissues.
Let's look at a few examples.
Where is your Achilles heel?
Reach down and grab that stringy, tough band of tissue on the back of your heel.
That's where you'll feel pain and stiffness when it becomes inflamed from repetitive stress, like walking more miles in a day than you usually do in a week.
It's called Achilles tendinopathy (also referred to as tendinitis).
A few tips for your Achilles tendon:
- Condition your body with regular walking, running, cycling and other activities like dancing, so your Achilles tendon becomes used to working hard and staying flexible.
- Avoid tight calf muscles with stretches, yoga, swimming, and massage.
- Use those muscle rollers and trigger point relief tools mentioned above.
- Warm up each morning before you hit the trail, with some gentle stretching and a slow start, especially if you have hours of uphill work ahead of you.
- Hydration keeps those tendon fibers as supple as age will allow, so keep plenty of clean water from your bottle or hydration pack flowing into your body.
Hiking injuries: IT band syndrome
IT might be something you've learned to associate with computer support, but here it means "iliotibial".
The term refers to a band of soft tissue (called fascia) that connects the knee (the tibial part) to the hip (the ilio part), running along the outside of your thigh.
Take a moment to rub side to side on this area from hip to knee.
- Does it feel sore? Any tight spots?
- That means you need a sports massage!
In hikers, this tremendously strong band of tissue can become inflamed when we hit it hard without being conditioned.
- It may also become painful, thanks to the many nerves it holds.
It can also be pulled over the knee joint to cause unwanted friction, along with pain, on the outside of your knee.
Please heed the warning this pain gives you.
Your IT band will not fix itself. You need to bring this problem to a sports medicine practitioner.
Proactive IT band strategies:
- Use a foam roller like this one plus your body weight to work out the soreness and tightness every day (this won't feel great, but do it anyway).
- RICE in this area after a hard hike or workout is a smart move.
- Don't sit so much in your everyday life: use a standing desk part of the work day, take a short walk or stretch break every 50 minutes when you're sitting, and consider other ways to get off your duff.
Bone issues like these are
less common hiking injuries
It's possible to dislocate your patella (kneecap) with a misplaced step sideways on a steep trail.
You might also develop a stress fracture or shin splints due to the unaccustomed load your backpack places on bone tissue.
If you fall on your outstretched wrist, a broken bone is a possibility.
A dislocated shoulder may occur if your trekking pole and your range of motion get into a fight - and the pole wins.
These injuries will curtail your ability to complete your hike, and for good reason: you have to rest the affected area for healing to begin, and seek medical attention.
Because these injuries need specific diagnosis and treatment, and may carry the additional risk of shock, I refer you to these resources:
- A backcountry first aid course from NOLS will familiarize you with how to deal with bone injuries like these before you can get home.
- Wilderness Medical Associates (WMA) offers first aid courses at various levels.
- These books outline appropriate responses, with titles that say it all, like Wilderness First Responder: How To Recognize Emergencies in the Backcountry.
Okay, I just have to say this
I'm skipping over politeness to say something I truly believe:
- Stubbornness and refusal to accept what's right in front of you is just plain silly.
Powering through, soldiering on, sucking up the pain - all of these behaviors are great ways to leave permanent damage in your body.
Also, very annoying to your trail buddies, who can clearly see you're hurting. And will be slowed down by your stubbornness.
When your body says to stop, STOP.
An acute injury can sometimes be cleared up in a day or two with a little patience, rest, and the tips provided here.
Sometimes it's going to take a long, long time before the nagging, chronic condition can be resolved.
- Don't add denial to your list of problems!
Give yourself the space and time to heal. It means you really like yourself ;)
Hiking injuries can be handled,
with preparation and training
But here's the good news.
You can be prepared to be prepared, and you won't blink an eye when you're faced with your own hiking injury or an injured companion.
I've shared these tips to help you think through some likely hiking injury scenarios, and to plan a well stocked first aid kit.
If you know how to use everything in your kit, so much the better.
Did you know that REI Co-op offers a class in exactly that, called "What's In Your First Aid Kit"?
- Check out a convenient location to take the class here.
- Tips on how to use REI classes to your best advantage here
Common Hiking Injuries
Purchasing hiking gear and equipment to handle hiking injuries from the links on this website may result in a small percentage of your purchase price to flow to Hiking For Her.
Your cost does not increase, but the ability of this website to keep providing free, trustworthy hiking tips does! Thank you.
|
I get emails all the time about what I wear, eat, carry and love to use on the trail. That's
why I provide affiliate links to you: the best gear that I use myself and have seen used by other hikers is instantly
available for your consideration, and the gear company sends a few
pennies per dollar to this reader-supported hiking website. There is no added cost to you! Everyone ends up a winner: Great gear for you, strong gear companies, and more free hiking tips for everyone. Thanks very much for your support. It's warmly and sincerely appreciated. It also helps send these hiking tips to all your virtual trail buddies around the globe. |
 |
