Hiking Toe Problems:
What You Can Do About Them
By Diane Spicer
Hiking toe problems can sideline your ambitious hiking plans.
Or end them altogether.
Why?
Gravity, friction, pressure, and heat all take their toll on your toes. And sometimes just one toe!
If you're an older hiker, or have an underlying condition that impairs or slows down healing time, you may also be at risk for hiking toe problems.
That's why you need these best tips for handling toe problems as a hiker.
Lucky for your toes, you've found them right here!
None of these hiking foot care tips are medical advice.
Use your own good judgment and visit your health care professional for foot care issues.
The real problem behind hiking toe problems
Prevention and treatment of hiking toe problems is a hiking best practice.
Ignoring your toes is not an option for a dedicated hiker. You use them for hours on end during a hike.
But there's a small problem (or as many as ten).
Those long suffering little digits on the end of your feet have a very limited vocabulary.
They have no big voice, like a pulled muscle or sprained ankle, to capture your attention.
So instead, they whisper and nag, trying to tell you they're heading for trouble. If you ignore them, they suffer in silence (or not).
What tales are your toes telling?
Let's unravel them.
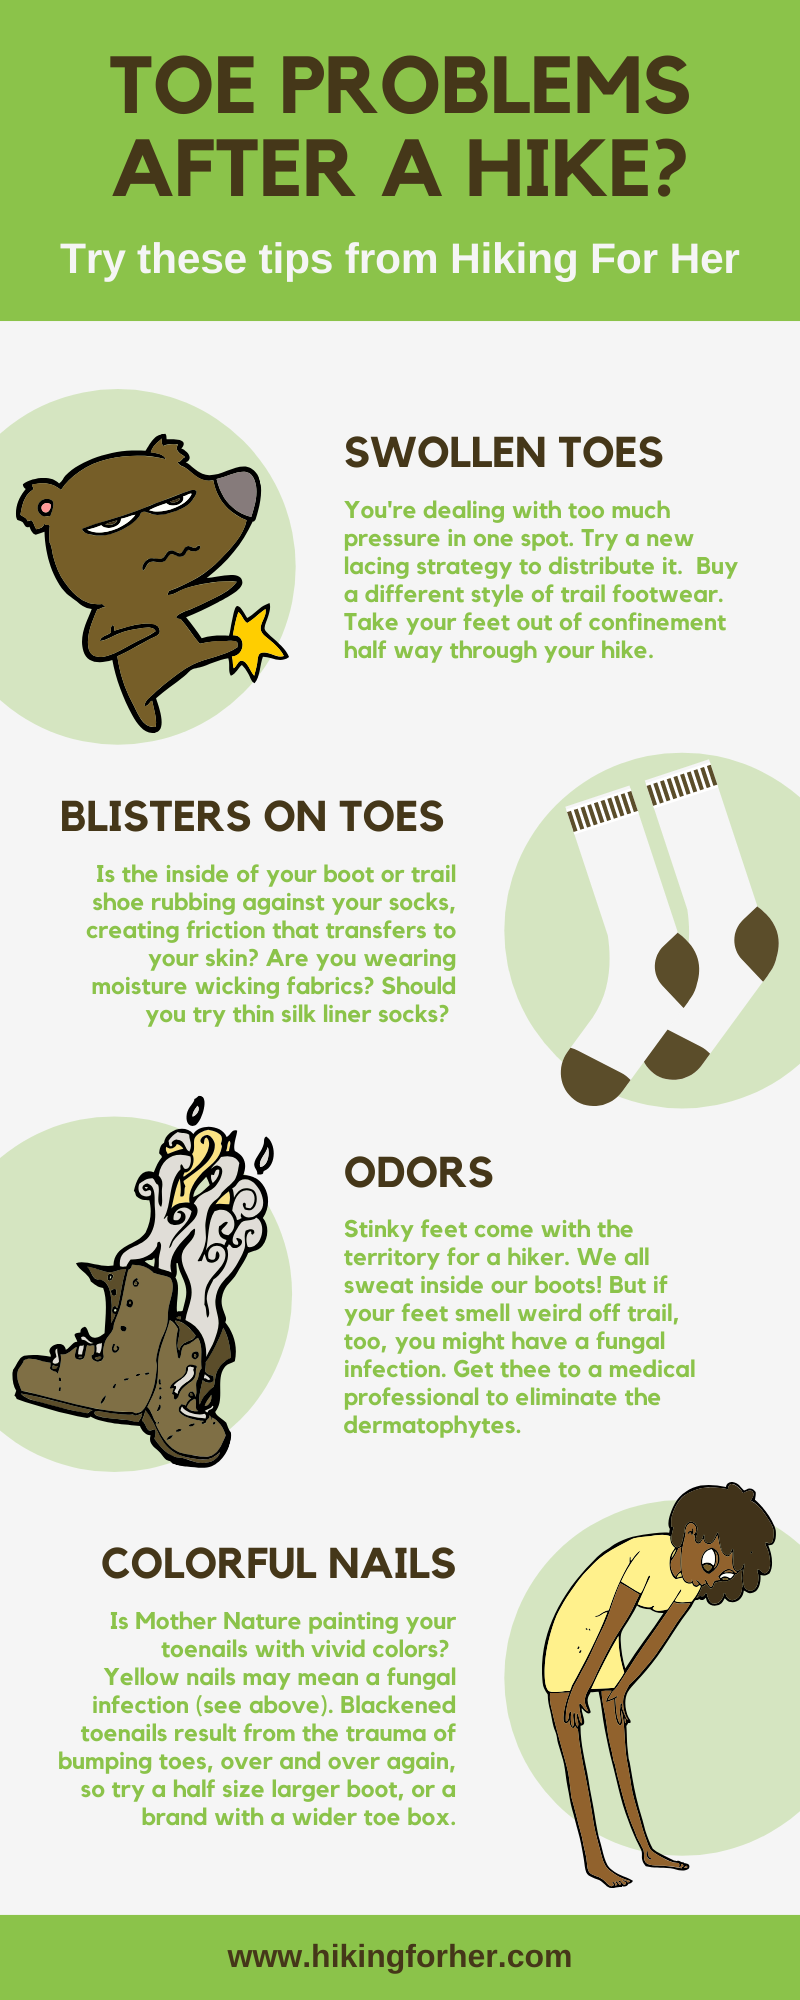
Swollen toes after hiking
It’s normal to have slightly swollen fingers, toes and ankles after a long hike.
Not fun, but you can deal with it using these tips:
- How to cope with swollen fingers
- How to cope with swollen feet and ankles
But it’s not normal to have one or two toes which are more swollen than the others.
When this happens, your job is to figure out what those tender toes endured, and then fix it.
Ask yourself these questions
about your hiking toe problems
- Was there more pressure or impact on that toe from a new boot that doesn't fit quite right?
- Did an old boot get wet on your last hike, and dry out in a new configuration to create an unexpected pressure point?
- Could it be that your hiking sock layers got bunched up, to create extra pressure, heat and friction there?
- If one of the middle little doggies is swollen or bruised, it's possible that a lacing problem on your trail footwear pressed on it all.day.long.
- Is there something embedded under the toenail? or in the skin?
- Did you walk around at your lunch spot or at the lake bare footed and cut yourself without noticing?
Whatever you do, don't ignore swollen toes
Heed that message.
It's a red flare pointing you to a troublesome issue that you need to deal with right away.
- Red, as in inflammation.
Why create even more hiking toe problems by the wishful thinking mantra "it'll go away"?
That never works!
Hot spots on your feet
If you have a blister by the end of a hike, it was created by the unavoidable triad of heat, friction and moisture.
Number One Rule For Hikers With Hot Spots: Jump all over them and eliminate as many factors in this triad as possible before you earn a painful blister.
Heat is generated from hiking, but you can direct heat away from your skin with technical hiking socks and good ventilation in your boots.
Good hiking socks will also reduce the amount of friction and moisture your feet experience on a hike.
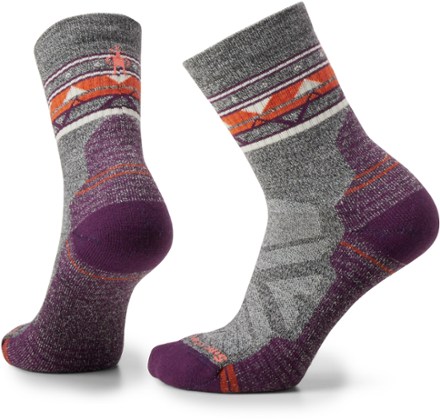
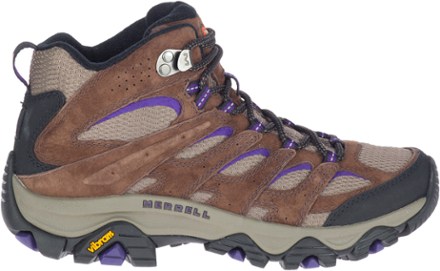
Here's a good combo from REI Co-op:
Amazon also carries these hiking socks and Merrell hiking boots.
Already have a blister from hiking?
Look at its location.
Has a blister formed on top of your toes?
- That means your socks rubbed against the skin with each step.
- Or they were sliding across your boot and dragging your skin with it.
- Swap out your socks for anti-blister socks, like ArmaSkin.
Blisters between the toes also can be a sock issue.
- Try breathable, wicking liner socks topped by thicker socks.
Blisters on the sides of your feet, including your toes, are a trail footwear problem.
There is too much pressure and friction on your skin at that particular location.
- Try new lacing strategies.
- Thinner socks might help.
- Apply moleskin on vulnerable areas to avoid these hiking toe problems.
Be scrupulous about emptying out your footwear before and after (and even during) a hike. You don't want troublesome trail debris trapped against your skin.
Tip:
Do you know about WURU wool? It's from New Zealand sheep. It's cleaned up and oh so soft. You can wind around your toes to prevent blisters.
- Read Hiking For Her's opinion of this anti blister approach.
Detailed hiking blister info:
Painful toes: one of many maddening hiking toe problems
Sometimes hiking toe problems like discomfort are normal.
Your mission, should you choose to accept it, is to distinguish between pain and soreness.
When you curl your toes, do you wince?
Or is it more of a tender feeling?
- Toes that are sore in all three dimensions could be a normal “souvenir” of your hike.
- That soreness means your many foot and toe muscles have been working hard.
A toe with a distinctive pain pattern, on the other hand foot, is a big red arrow.
It's pointing to something that you need to change or switch up with your footwear.
It can also indicate a bone problem or inflammation. That requires a visit to a podiatrist before you hike on it again.
Take a close look at your toes
If you've been hiking for awhile, looking at your toes can be sobering. They won't be a pretty sight!
But compare the painful ones with non-painful companions on both feet.
Notice anything unusual with the toenails or joints?
For example:
Athlete's foot, a fungal infection, will make your toes burn and itch. You may notice painful peeled and cracked skin, on one toe or on several of them.
- Get on top of this right away, to prevent the fungus from
spreading to the rest of your foot, or between feet.
- Keep reading for details.
Hiker's toenail
Hiker's toenail is a perpetual problem for those of us who rack up lots of mileage.
This condition makes your toenail dark, blackened, and can sometimes lead to loss of the toenail.
The pain and discomfort in one particular toe is due to repeated trauma of smacking up against the toe of your hiking boot.
And the longer your toenail, the worse the problem.
Trail tip
Short, blunt cut toenails are the way to go for hikers.
Make it a habit to trim your nails before every hike.
Nails grow quickly enough to catch you by surprise between hikes.
This is especially true on a long backpacking trip.
Blackened toenails
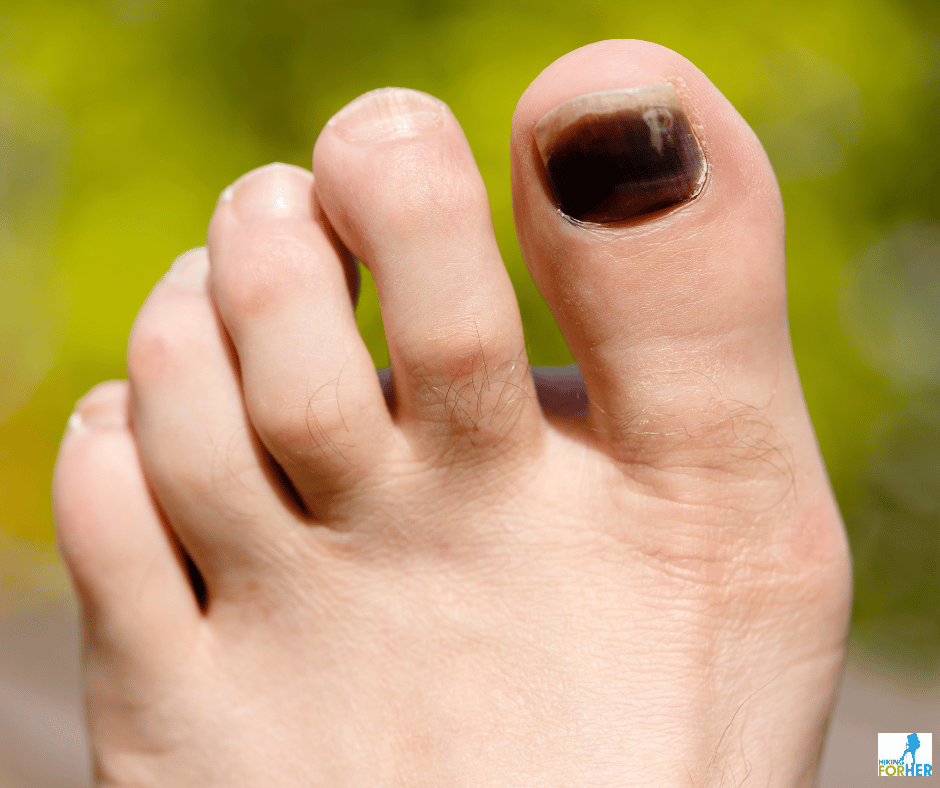 Will this hiker lose this nail? Time will tell.
A blackened toenail is a sign of bruising in the nail bed. It is caused by repeated trauma inside your trail footwear.
Example:
- Your toes bump against the front of the toe box as you descend a long, steep trail. Bump, bump, bump... until it's blackened.
Luckily, the nail will fall off on its own once it's traumatized enough, and you will grow a shiny new one.
That was the good news.
Now for the not so good news about damaged toenails
Losing and regrowing a nail will take a long time.
Regrown toenails are often lumpy, bumpy and weird looking!
This may prevent you from wearing sandals in public if you’re squeamish about the appearance of your feet.
- Long distance hikers consider lost toenails a perverse badge of honor!
- Wear yours with pride if the shoe or boot fits!
Yellow nails on hiking feet
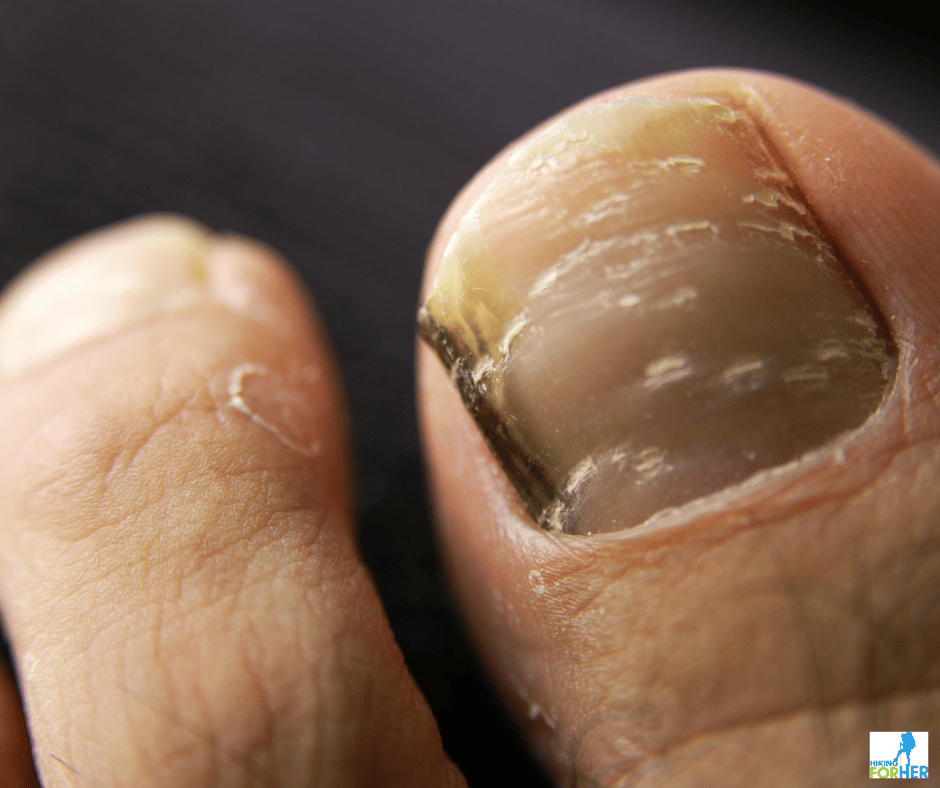
Yellowed, sometimes cracked nails can be signs of a fungal infection (onychomycosis).
- Here are more photos of a full range of foot fungal infections, for your viewing pleasure.
The fungus has gotten into your nail due to a small cut or break, and has colonized the nail.
It's not usually painful, but it should get your attention because the nail gets thicker, turns color, and may have lines or breaks in it.
It will take some time to rid your nails of these fungal invaders.
Once you do, make sure you have a brand new pair of boots or trail shoes so you don’t re-infect yourself.
It's also a great idea to disinfect your daily footwear, or replace it if possible.
Tip when buying used hiking footwear
Don't try on used hiking boots without wearing your freshly laundered hiking socks.
You don't want to inherit a nasty case of onychomycosis!
It will lead to big time hiking toe problems for you, and your trail partners if you share outdoor trail gear.
Ingrown toenails
Just what it sounds like: the corner or the side of the nail has grown into the skin near it.
For a hiker, that's usually a toenail problem which develops on the big toe(s).
This is a painful hiking toe condition, and it will show signs of inflammation such as redness and swelling.
Don't ignore this one, because it could progress to an infection and completely derail your hiking plans.
Use these prevention tips to prevent an ingrown toenail:
- Cut your toenails straight across.
- Don't cut your nails severely short. A moderate length will allow the edges of the nail to sit normally against the skin of the toe.
- Choose hiking boots that don't crowd your toes.
- If you notice a developing ingrown toenail problem, soak your foot in warm water before attempting to lift the edge of the nail with a cotton swab so you can trim it properly. Medical treatment may be needed if signs of infection are already present.
Calluses are common on hiking feet
A callus is Nature’s way of protecting the delicate underlying nerves and blood vessels by adding extra layers of skin between you and the source of friction.
That thick layer of dead skin cells protects soft tissue damage from repetitive forces.
A hiker’s foot should develop these tough layers of skin after several hikes.
They develop at the contact points between your skin and your hiking boot or trail shoe.
If you wear several types of hiking footwear, you will develop an entire constellation of calluses, but here are a few common areas:
- bottoms of one or more toes
- along the sides of the big toes
The more you hike, the more pronounced these raised patches of skin will appear.
You can smooth these calluses with a nifty little volcanic pumice stone like this one.
But go easy!
You don’t want to remove these protective little bumps of
dead skin completely. You earned their protection!
Odors: the tale of the stinky toes
Bromodosis is the fancy word for the odor emanating from your well loved hiking boots.
Blame it on the fact that you have more sweat glands in your feet than anywhere else.
Weird, right?
Plus, gazillions of resident bacteria living on your skin.
- They love to eat up sweat molecules and then “burp” inside your boots. How rude!
This olfactory combination of food + microbial normal flora gives you Sweaty Boot Essence. Welcome to the hiking club!
But let's be clear here
It's true that you can expect a certain amount of odor in your trail footwear.
But when your toes smell more weird than usual, and smell A LOT, you need to rule out fungal infections.
This is especially true if it the odor is from the toe area of one foot that is odiferous, scaly and uncomfortable. And it is noticeable both on and off trail.
- Scraping off some of your skin (it won't hurt!) and examining it under a microscope is the standard way to look for fungi, so get thee to a health care provider ASAP.
Trail tip
Blame a funky smelling backpacking tent or gear locker on microorganisms, too.
They eat and create odors. What they may be living on is your tent, rain gear, backpack...
These are completely normal microbiological processes.
So the word blame might not be correct.
- Everybody's gotta eat, right?
To keep funky odors to a minimum:
- Air out your gear every season.
- Never store wet gear for any length of time.
- Set up your tent every season, even if you don't use it.
It takes discipline to put away clean, dry gear but you're up to the task, I just know it!
More tips to solve your hiking toe problems
If your toes are taking a beating on every hike, you need to spot -and fix- the hiking toe problems.
Which of these might be the explanation?
Improper boot or trail shoe fit
Your boots or trail shoes might not fit you right – especially if they’re brand new.
If you can't wait to get your boots off, that's a big clue about fit!
Back to the store they go!
That’s why it makes sense to buy from reputable gear stores like REI, with decent exchange policies.
- Enjoy 14 member benefits when you join REI Co-op
How heavy is your pack?
If your feet and toes hurt during, and after, your hike, think about this.
It's possible that you’re carrying too much weight for what you’re wearing on your feet.
Consider more supportive footwear in a half size larger.Your foot bones can then distribute your weight better, sparing your toes (somewhat).
- A switch to boots with sturdy arches, rather than trail shoes, can help.
Read my review of this type of boots. - Supportive, cushioning socks are also an idea to try.
The flip side is to carry less and stay with the trail footwear you already have.
- Read these tips on ultralight and lightweight gear.
Check your insoles
Every pair of hiking footwear comes with insoles.
When your insoles wear out, your toes begin to bump against the front of your footwear.
It's because your heel is no longer hitting in the right place.
If the soles and uppers are still in good shape, take out the old insoles and replace them.
These insoles can be customized to each of your feet.
- No worries if one foot is a different dimension than the other (a common hiking issue). Cut to fit your foot contours!
- While not a cheap fix, this gives a longer lasting solution if your boots are new(ish) and you like the fit but have gotten a blister or hot spot in them.
Third option:
- Read my Tread Labs review for a look at durable insoles with replaceable top covers. I love mine.
They make insoles to give you more support in boots and shoes with non-removable insoles, too. Great company, great product!
Are lacing issues lurking?
Hiking toe problems could be a lacing problem in disguise.
Experiment with new ways to hold your feet in place and prevent toe bumping.
Fresh air is your friend
Give your feet some fresh air at least once during a hike.
This also does some really nice things:
- Dries up sweaty skin, thus preventing blisters
- Allows oxygenated blood to flow to the engorged blood vessels in your feet
- Dobs
the fungal
population of the damp dark conditions they prefer
- Encourages you to notice the tales your toes are telling
Plus it's a great excuse to put your feet up as you enjoy the hiking scenery you worked so hard to achieve.
Always remember to dump out your boots or trail shoes when you've finished with them, and hang them to air dry somewhere well ventilated. If you throw them in a closet, you're encouraging the microbes that lurk in dark, damp spots.
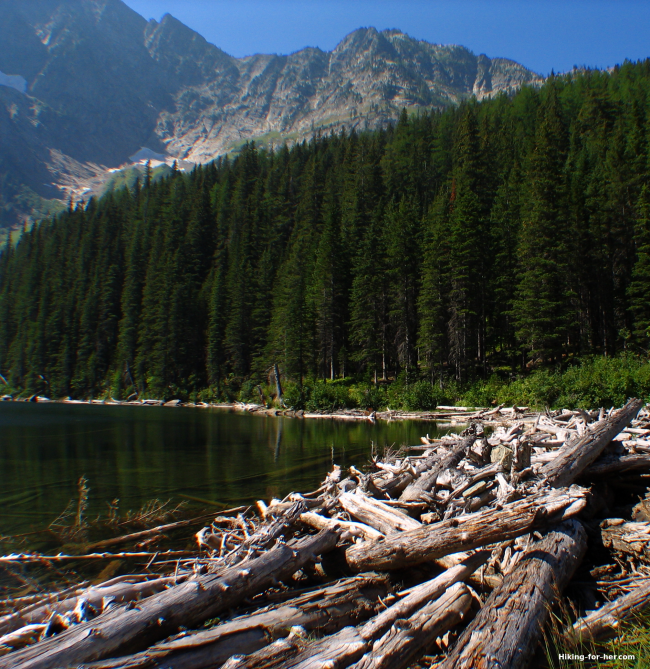 Bonus points for a nice relaxing foot soak at the lake shore. Ahhh!
Good foot hygiene can prevent hiking toe problems
Backpackers need to pay constant attention to their feet, for obvious reasons.
Daily foot hygiene can make a long backpacking trip enjoyable.
Neglecting your feet? Not so much.
Here are some tips for keeping your ten toes in good shape, along with everything else connected to them.
Use pre-moistened wipes midway through your day if you aren't near surface water.
- These wipes work well.
- You can dry them out and re-use them for cleaning chores at camp.
Make time at the end of the day to inspect your toes and the webbing between them. Search carefully for places where dirt can get into your bloodstream.
- When you find them, wash the area with soap and water.
- After it's dried, consider whether covering it is a good idea.
Use Leukotape to jump on hot spots immediately, not at the "next" stop. Although it's branded as a "sports tape", it adheres well to moist skin.
DO NOT WAIT! It's better to prevent than treat a blister.
Keep trimming your toenails straight across, and don't damage the cuticle if you're removing dirt from beneath the nail
Eliminate your hiking toe problems by treating your toes right!
Banged up, callused hiking feet are all part of the fun of being a hiker.
But you don't have to suffer with hiking toe problems.
A little proactive strategy based on these best hiking toe problem busters? Your toes will feel happy again!
And happy toes make happy hikers.
For more hiking self care strategies for happy trails, read this.
Pin these to your Pinterest hiking boards to keep these hiking toe tips handy
(pun intended).
Just want some great tips for
general hiking foot care?
Hiking For Her recommends these smart strategies
and good foot care products for you.
Home page > Best Hiking Tips >
Hiking Toe Problems And Solutions
|
I get emails all the time about what I wear, eat, carry and love to use on the trail. That's
why I provide affiliate links to you: the best gear that I use myself and have seen used by other hikers is instantly
available for your consideration, and the gear company sends a few
pennies per dollar to this reader-supported hiking website. There is no added cost to you! Everyone ends up a winner: Great gear for you, strong gear companies, and more free hiking tips for everyone. Thanks very much for your support. It's warmly and sincerely appreciated. It also helps send these hiking tips to all your virtual trail buddies around the globe. |
 |
