Wrangell St Elias Hiking Trip Report:
I Came, I Saw,
But I Will Never Conquer
By Diane Spicer
This Wrangell St Elias hiking trip report combines two different trips I took to this amazing Alaska hiking destination:
- My August 2023 trip (report begins here)
- My July 2017 trip (report begins here)
In total, I explored six very different parts of Wrangell St. Elias National Park.
Bush planes and guides were needed to cover so much ground in so little time (although ten days at a time in the backcountry in Alaska is not considered a trivial trip, given weather and bear concerns).
All of the opinions, comments, photos and information belong to Hiking For Her, and were unsolicited by outside parties.
The purpose of this trip report is to take you to a place of remoteness without leaving your chair.
Or maybe to begin planning for an adventure so you can write your own Wrangell St. Elias hiking trip report.
My time there didn't even begin to uncover the wonders of this National Park and Preserve, but I hope to give you a small taste of this gorgeous hiking destination.
Don't want an independent remote trip like mine, but still want a taste of hiking in this park?
REI Co-op runs these trips.
Some background on this Alaskan wilderness
Congress protected the 9.6 million acres of Wrangell St. Elias National Park and Preserve with a wilderness designation in 1964.
- Get an overview of the vastness of 9.6 million acres from the NPS.
This huge amount of precious wilderness borders other remote northern areas I've ventured into. Read about my hiking trips here:
- Canada's Kluane National Park and Reserve (coming soon)
- Canada and U.S. Tatshenshini-Alsek Provincial Park
Taken together, you're looking at an international cooperation to set aside a 24 million acre World Heritage site.
Wow! doesn't begin to describe what awaits you.
If you'd like to pull together a short backpacking trip into this area, read my tips here.
Be sure to monitor the weather here to get a sense of what you're facing.
And always practice LeaveNoTrace hiking! This is especially relevant to protecting this pristine wilderness for generations to come.
- It's also to preserve your own life when surrounded by bears. A lot of them!
Be sure to ponder this before you read
this Wrangell St. Elias hiking trip report
The Wrangell St Elias National Park and Preserve is not easy to get to, and that makes it remote.
Remote, as in:
- Only 2 rough gravel roads as access points for backcountry hiking
- Bush planes needed to bring you to/from most hiking jumping off points
- Riding a wild river on a packraft as a viable option for getting out of the backcountry
All this means that you're on your own, and need some top notch hiking and camping skills. All of which I freely share on this website!
- Use the search box at the top of the page to get started.
Still with me?
You're my kind of hiker!
This Wrangell St. Elias hiking trip report takes you through the planning and preparation I used to pull off two fantastic ten to twelve day backcountry hiking trips.
I used a basecamp approach, supported by bush planes and backcountry guides. You'll see why if you keep reading.
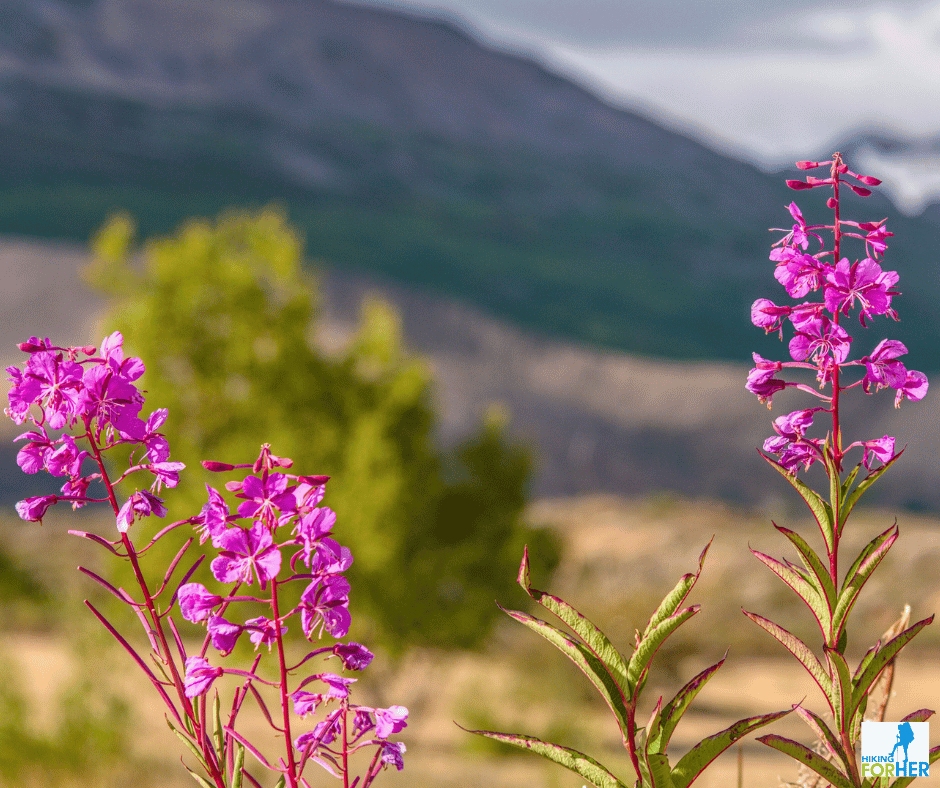 Quintessential Alaskan flower, fireweed. As the open blooms approach the tip of the flower, you know the very short summer is coming to a close.
August 2023 Wrangell St. Elias
hiking trip report
I'll try to be thorough with this trip report, and include everything you need to know to plan one yourself (or to vicariously enjoy this one).
Topics include:
- Trip locations
- Travel logistics to and from the park
- Air travel within the park
- Why hire a guide and why basecamp
- Gear and clothing I used and recommend for this terrain
- Day by day hiking
Choosing locations for this backcountry
adventure in Wrangell St. Elias
Like any hiker, I started my planning with reading some guidebooks about Alaska in general, and in particular the Wrangell St. Elias area.
- 55 Ways to the Wilderness in Southcentral Alaska, Helen D. Nienhueser
- Hiking Alaska, Dean Littlepage
- Hiking in Wrangell-St. Elias National Park, Danny W. Kost
- Hiking Alaska's Wrangell-St. Elias National Park & Preserve: From Day Hikes to Backcountry Treks, Greg Fensterman
And then I turned my attention to maps.
I used Google Maps to explore the terrain, using the town of McCarthy as an anchor.
The question I asked: "What looks hikable and is flyable (as in has an airstrip and is within flying distance)"?
This Wrangell St. Elias topographical map was helpful to get a close look at particular areas.
And I made good use of the free maps of the park provided by USGS (United States Geologic Survey).
Choosing locations
Because this was my second trip to Wrangell St. Elias, I had a general feel for the areas I wanted to come back to explore.
Three destinations were chosen for their geologic features and wildlife viewing opportunities (and because they had airstrips):
- Steamboat Hills (East)
- Bremner
- Fan Glacier
I'll describe each area in this trip report, along with photos to convey a sense of the place. Drop down to see them right away.
Travel logistics to and from the park
To get to the jumping off point of this backcountry trip, you need to get yourself to the remote town of McCarthy.
For me, that involved flying to Anchorage from Seattle, then taking a 4 hour shuttle van to Glennallen/Gulkana.
- The two lane paved road passed through the Matanuska-Susitna Valley, quite beautiful and a tantalizing appetizer to Alaska terrain.
Then I boarded a plane for an hour flight to the McCarthy airstrip.
On the way home, I flew back to Glennallen and changed planes to arrive in Anchorage, saving myself time and the aggravation of the McCarthy unpaved, potholed road.
On my 2017 trip, we drove both ways to McCarthy from Anchorage, adding a lot of time (and kidney shaken misery) to the trip.
Air travel and guides within the park
Backcountry drop offs are available from Wrangell Mountain Air.
- Your gear, food and you get on the plane and get off at the airstrip of your choice.
Depending on the airstrip and weather conditions, you may be flying in a Cessna 185, a Cub, or a Beaver.
We used all 3 on this trip, dependent upon wind and weather conditions.
- Read about locations and pricing here.
That link also gives you information on the available guiding services.
I have experience with two of them:
- Expeditions Alaska
- St. Elias Alpine Guides
Feel free to contact me for my impressions and tips on how to plan a great trip with them.
Right up front, you need to know that you are one of many groups moving around the park on any given day.
Add in dicey weather conditions, and you may be sitting for a long time waiting for an air pickup.
Dial in your inner nirvana (take a look at where you are for starters!) and accept it.
Why hire a guide?
Why use a basecamp?
Looking at this corner of drool worthy but challenging hiking territory on maps, it became obvious that an experienced backcountry guide would help with:
- route finding
- communication with pilots and emergency responders
- meal planning and preparation
- SAT phone availability and someone on the other end who could help with logistics and change in plans
- daily camp logistics (water source, food prep and clean up, bear awareness and safety)
- insider information about best locations within the park
Hiring a guide can take many back-and-forths, so start your planning in January if you're headed to the park next summer.
Should you spend your precious backcountry days backpacking, or base camping?
The merits and potential payoff of backpacking are that you can cover a lot of terrain each day and achieve one final objective, either point to point or in a loop.
- You will need to keep moving in
order to be at your pickup spot on time. This might be a challenge when
(not if) the weather sours or the terrain slows you down.
- The amount of food you can carry is
limited, unless you schedule a resupply via bush plane. Resupplies add to the
logistics and expense of the trip.
I felt the merits of base camping gave me the ability to tap out all the juicy goodness of several areas, while providing a margin of safety in inclement weather.
Turns out, I was right!
Here's the gear and clothing I used
to stay safe and comfortable
Many people ask me for my recommendations of outdoor products that stand up to rugged, relentless conditions in Alaska.
Here they are, included for you in this Wrangell St. Elias trip report!
These links go to my trusted affiliates.
You pay nothing extra if you purchase through one of the links. Hiking For Her may receive a small commission.
It's the only way this website survives (no ads or sponsored links), so thanks for considering!
Shelter and sleep system
for an Alaskan hiking trip
The very first thing I do when I hit a new spot in the backcountry is set up my tent and sleep system.
Weather blows in quickly, mosquitoes can be merciless, and sometimes I just want to cocoon into my sleeping bag and take a nap. Shelter is Priority #1 here.
This is the gear that stood up to my 2023 Alaskan backcountry conditions:
- MSR Elixir 2 Tent with Footprint
- Big Agnes Divide Insulated Sleeping Pad
- Outdoor Vitals Sleeping Bag
- Outdoor Vitals Ultralight Stretch Pillow
Backcountry kitchen gear
Access to running water is the first problem to solve once you've got shelter.
Glacial rivers are too silty, and sometimes too treacherous to access, to be a good water source.
A clear running stream is a highly prized asset to a backcountry camp.
We did not treat our water on this trip, as the locations we visited were remote.
Meals were prepared using this gear:
I have lots more backcountry kitchen tips and recommendations for you right here.
Ditto for high calorie backpacking food to keep you fueled.
Clothing layering system used in this
Wrangell St. Elias hiking trip report
I need my clothing to do very specific things when I'm way out there: wick my sweat when I hike, keep me warm when I'm sitting around or sleeping, keep me dry at all times.
My rain gear for this Wrangell St. Eiias hiking trip report included:
- this Arc'teryx jacket
- these full zip REI rain pants
- this snug Merino beanie (I slept in it every night)
I rely on this layer to keep me alive in Alaskan conditions, so I buy the best and economize elsewhere!
My base layer included an Alpine Fit shirt I reviewed here.
My mid layers came on and off as the weather changed by the hour, and included this down vest and this hoodie.
My outer layer for dry weather was this down jacket with hood.
For more detailed layering suggestions including gloves, read this.
Boot and sock combo used in this
Wrangell St. Elias hiking trip report
I've used a lot of brands of hiking boots over the years, and there are a few brands I stick with for rugged off trail adventures like this one.
I wore Salomon boots and Darn Tough socks, and I mean really wore them, as in:
- On the commercial flights into/out of Anchorage
- On the van shuttle
- On bush planes
- Hiking
- Around camp
That's how comfortable I feel in them! That's the key to your footwear, comfort, followed by performance.
- For more footwear tips, start here.
I also brought a pair of Crocs for water crossings and as a camp shoe.
Backpack & poles used in this Wrangell St. Elias
hiking trip report
I have an ancient GoLite backpack that I always use for trips like this. It's no longer available, so I have no current words of wisdom for you on a good pack for a trip like this.
One word of caution, though:
- Be sure the pack has enough room for a bear canister as well as your gear.
- Plus whatever else you may have to carry as part of a group: parts of a tent, a cookpot, a cutting board - all examples of what I've had to stash at the last minute.
- Easy access to the canister makes life so much easier!
News flash: I've decided that I will replace this old pack after nearly three decades of use. I've got my eye on this backpack for the next trip.
I use these poles, they go everywhere with me when I'm hiking. So useful for balance and stability on rocky terrain and uneven tundra.
Wrangell St. Elias hiking trip report:
day by day
As mentioned above, we had 3 locations to visit.
It took awhile to get out of McCarthy, as we had to make two trips and the pilot wasn't available first thing, but at last, we got to our first base camp location.
Steamboat Hills (East)
Steamboat Hills is situated on the northern edge of the eastern Chugach Mountains, just south of the Chitina River.
This location offers tundra walking in several directions, and views of all the local and very impressive peaks in clear weather.
Steamboat Hills is not exactly a tourist hot spot, meaning we had it completely to ourselves for the 3 nights we were there. Hurrah!
The terrain on this high plateau is an exquisite surprise, given where you are in Alaska: long, open rolling expanses, surrounded by mountains, and a plethora of hidden lakes that take a lot of exploring to find.
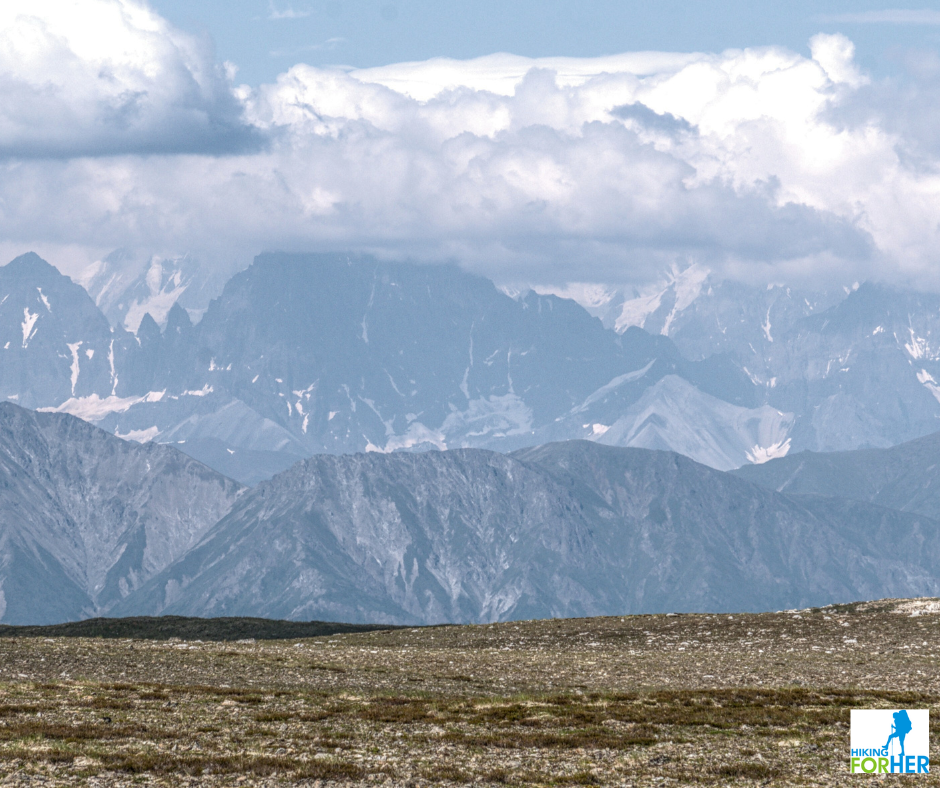 The Wrangells, wrapped as usual in clouds
Its remote location requires the use of small bush planes, which is part of the thrill of backcountry hiking in Alaska.
The landing strip wasn't exactly easy to spot from the air, but the trusty pilot knew exactly where to land.
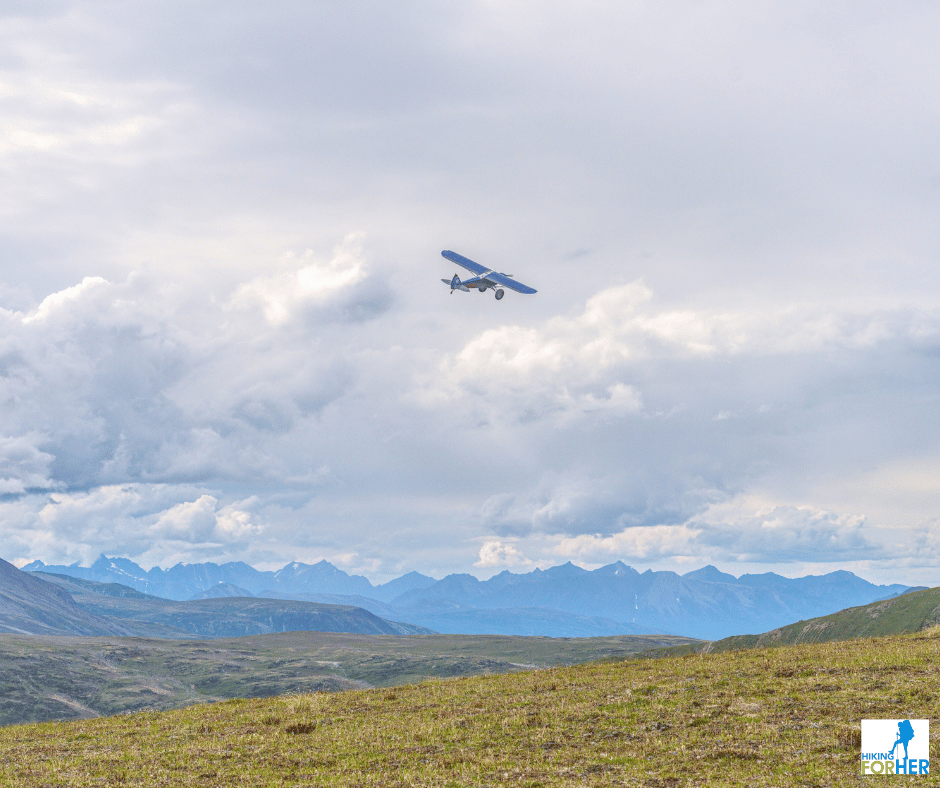 Small, agile, one passenger Supercub getting ready to touch down at the Steamboat East "airstrip".
The terrain dropped away precipitously in two directions from our camp, but we had plenty of room to roam!
Views of the Tana, Chitina, Nizina and Chitistone Rivers "down in the holes" were spectacular.
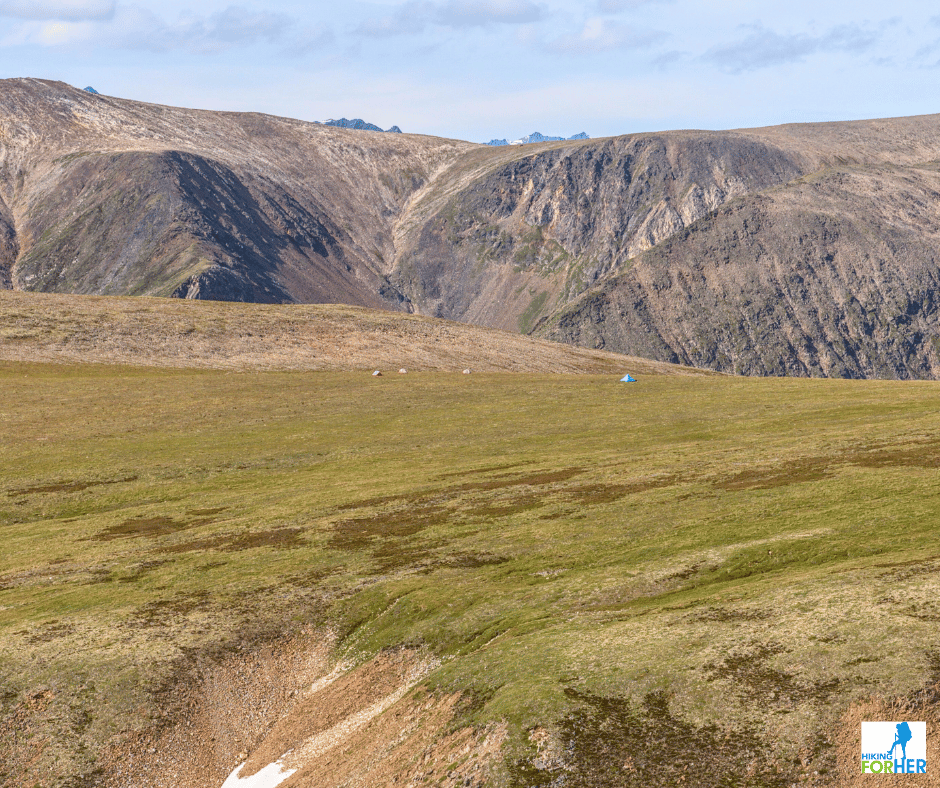 We used a kitchen tent (tall blue one on the right) and 3 backpacking tents to make camp. All food was stored even further uphill away from us.
We spent three full days exploring Steamboat Hills, roaming for hours and hours just drinking in the mountains and lakes.
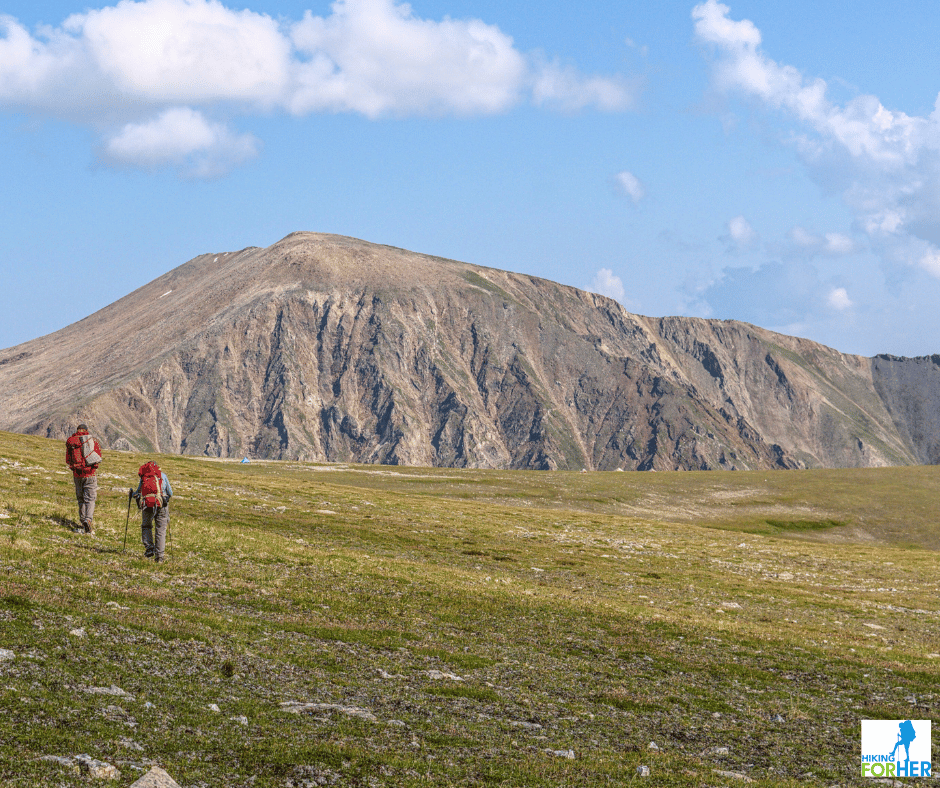 Looks like easy going tundra walking, but the uneven terrain takes a toll after hours of hiking
You never know what your view will include when you climb one of the high points at Steamboat.
It could be this:
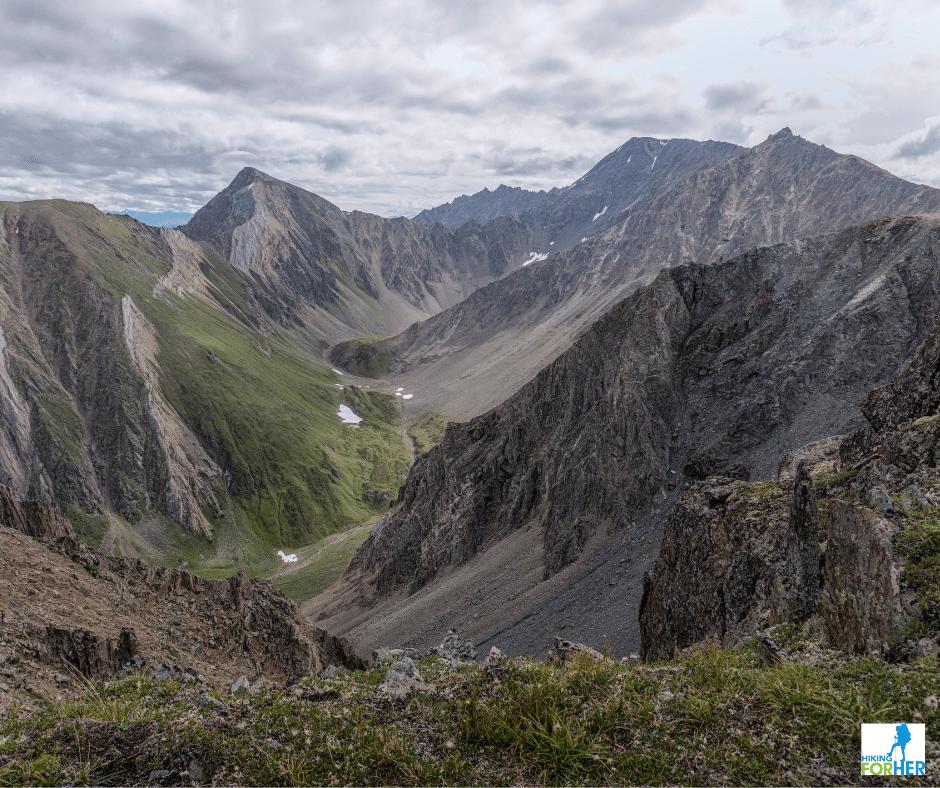 Barren rock and lush hillsides, side by side
Or this:
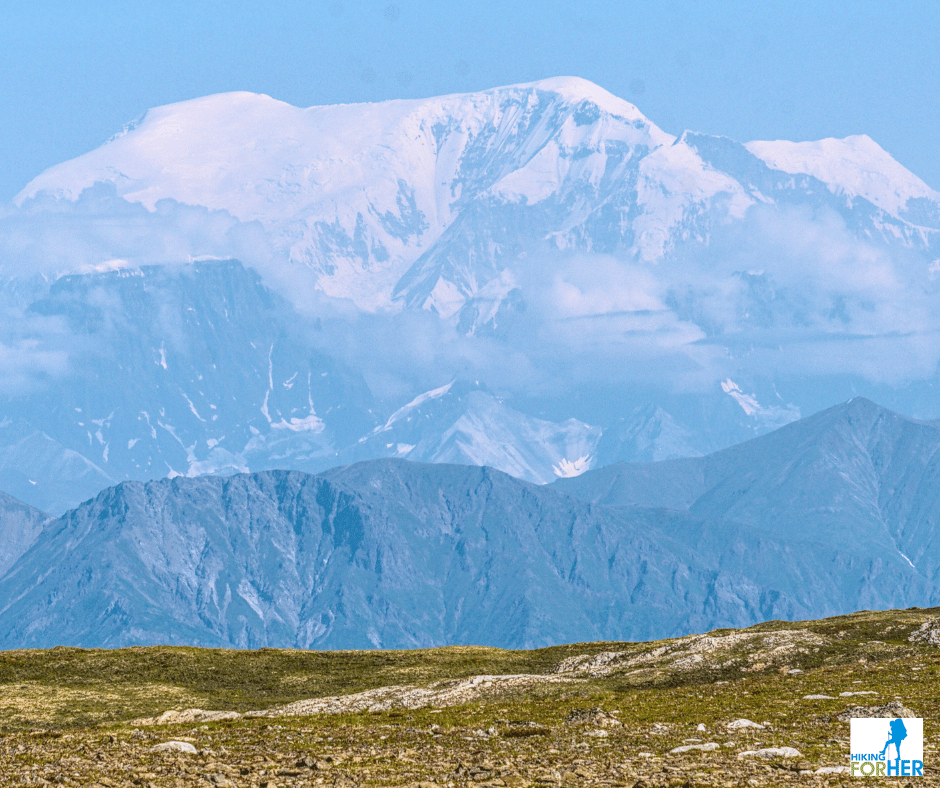 Our reward for hours of hiking, a clear view of Mount Blackburn, one of the highest mountains in this area at 16,237 feet.
We were blessed with clear skies and sunshine for the first few days, a gift from the weather gods that a hiker should be extremely grateful for in Alaska.
It was a big thrill to discover a chain of gorgeous lakes nestled into the rolling terrain of the dry plateau. We explored four of them, and wished we could have seen them all.
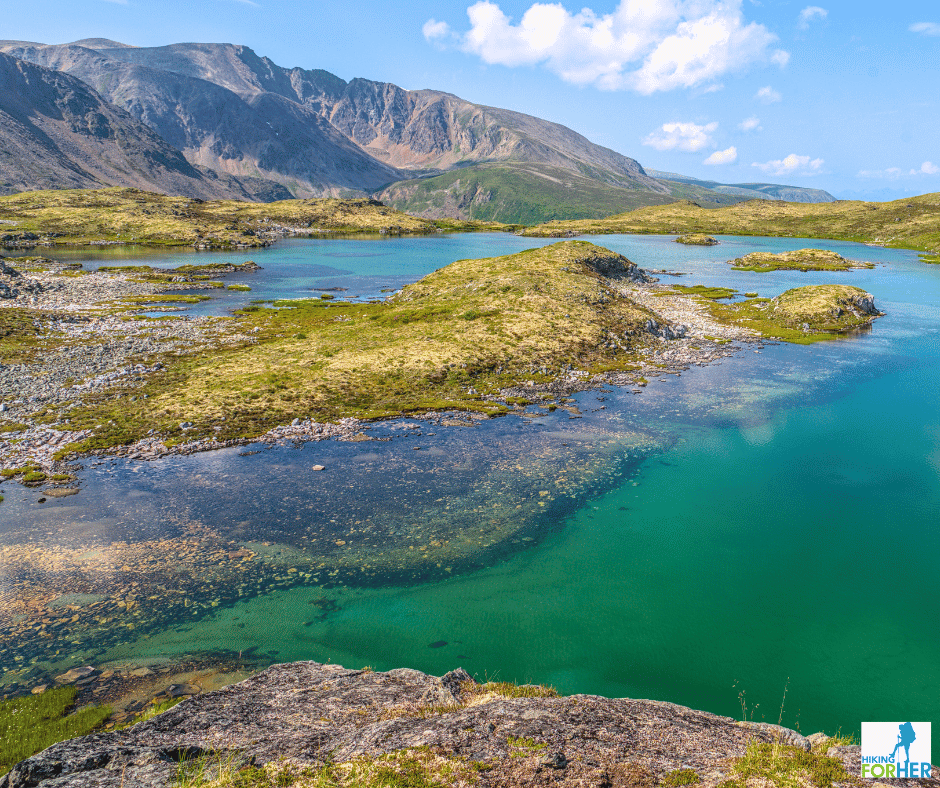 You don't get many days like this in Alaska! Clear skies, no bugs, and gorgeous lakes to explore...
We were delayed leaving for our next destination by an unusual hours long thunderstorm (lightning is not common here) followed by ferocious winds.
Exciting times in a tent!
If you've ever played "Predict when the tent poles are gonna snap", you know what I mean.
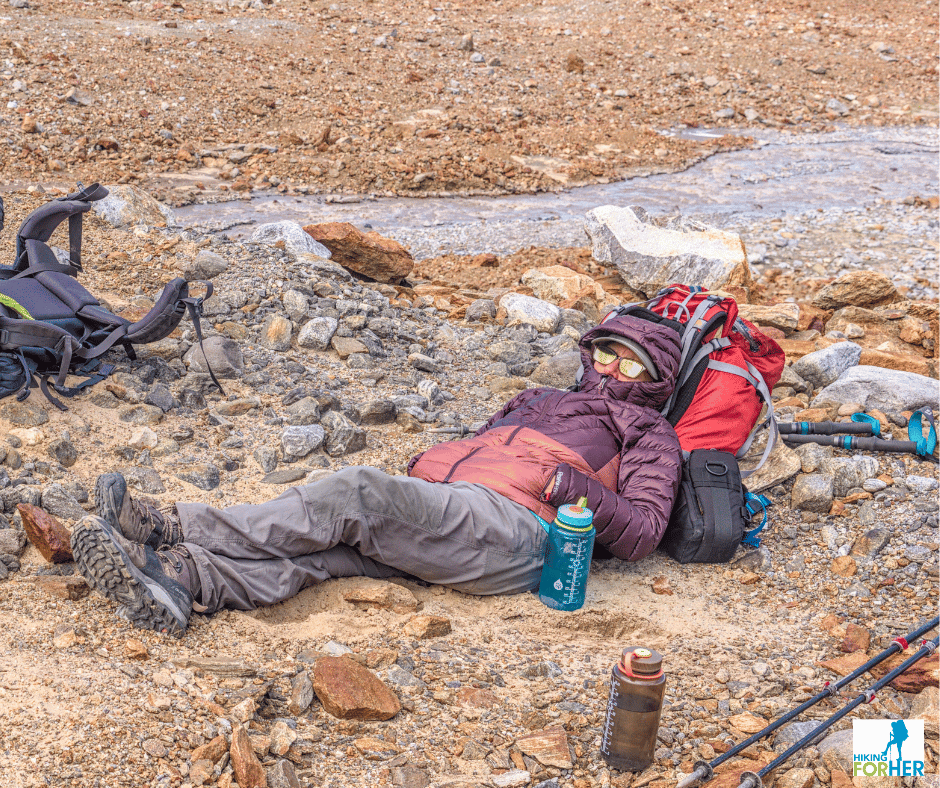 Lest you think it's all sweetness and light, here I am waiting out the wind and hoping the plane can land before dark.
At last the winds cooperated and it was time to get on the plane to head to our second location in this Wrangell St. Elias hiking trip report, a place called Bremner Historic District.
Bremner Mines: second stop in this
Wrangell St. Elias hiking trip report
Dropping into the narrow Bremner valley after being in the glorious open air of Steamboat Hills was disconcerting.
The stormy weather didn't help any.
We pitched camp at the end of the airstrip, with rusting metal mining artifacts just feet away from our tents.
Also, fresh bear scat.
A lot of it.
Epic downpours throughout the night and next day kept us locked down for over 18 hours total.
Even huddled out of the rain under our kitchen tent, this place was no fun.
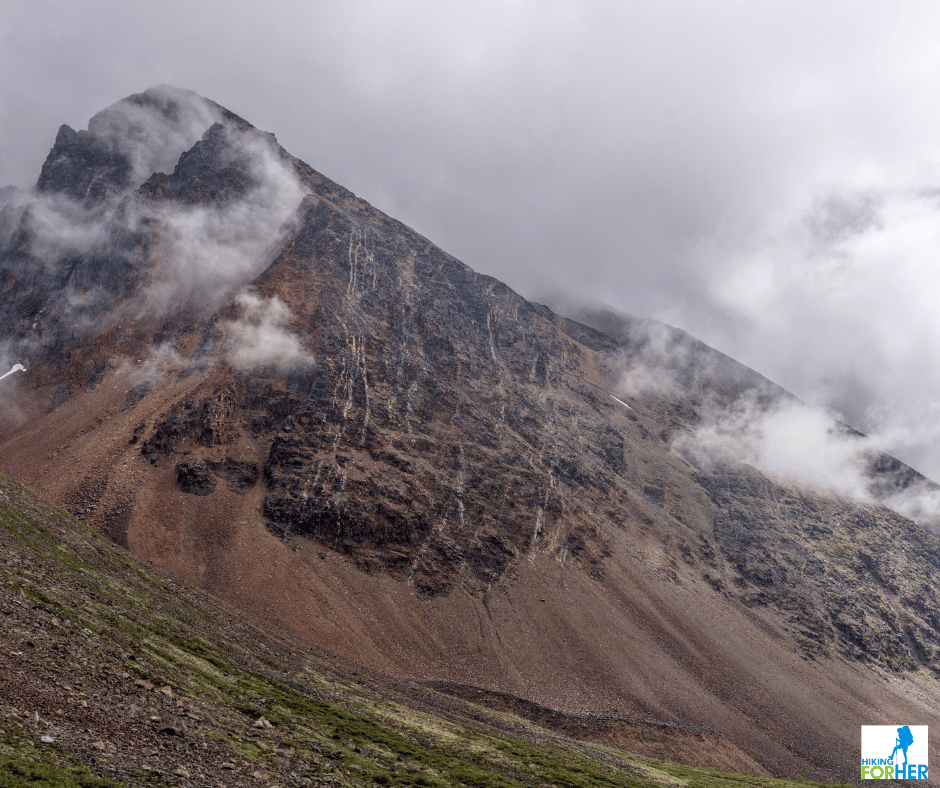 Won't those clouds lift? Nope!
Once it stopped pounding down rain and transitioned into mere showers, we used the old mining road that bisects the deep valley to take a leg stretching stroll.
It led us to the Bremner base of mining operations in the 1920s and 30s.
- Gold mining, to be exact, although on a small scale.
An intrepid hiker can still access some of the gold rush historic pits on the hillsides, if extensive bushwacking and a phenomenal amount of bear scat does not slow her down.
This particular hiker declined.
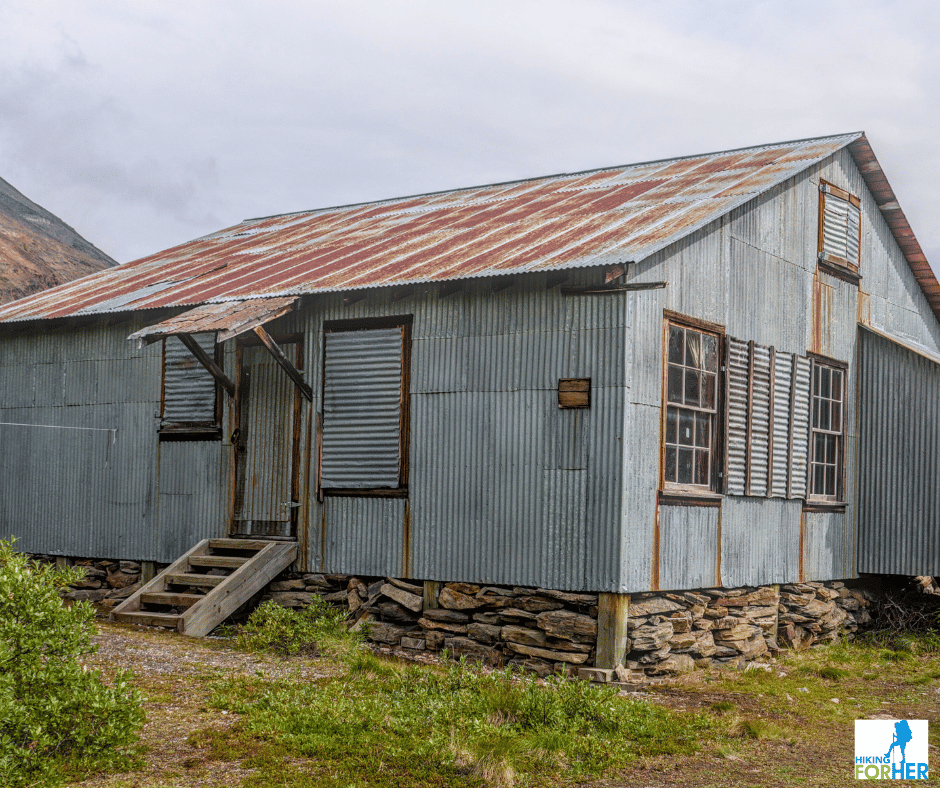 National Park Service maintains a public use cabin at Bremner. First come, first served.
Inside this cabin we found a picnic table, a writing desk with log books to thumb through, several metal cots to be used by soggy hikers, a room of guidebooks and artwork left by previous travelers, and lots more.
It was nice to enjoy a dry place for lunch, but it felt weird to be inside four walls!
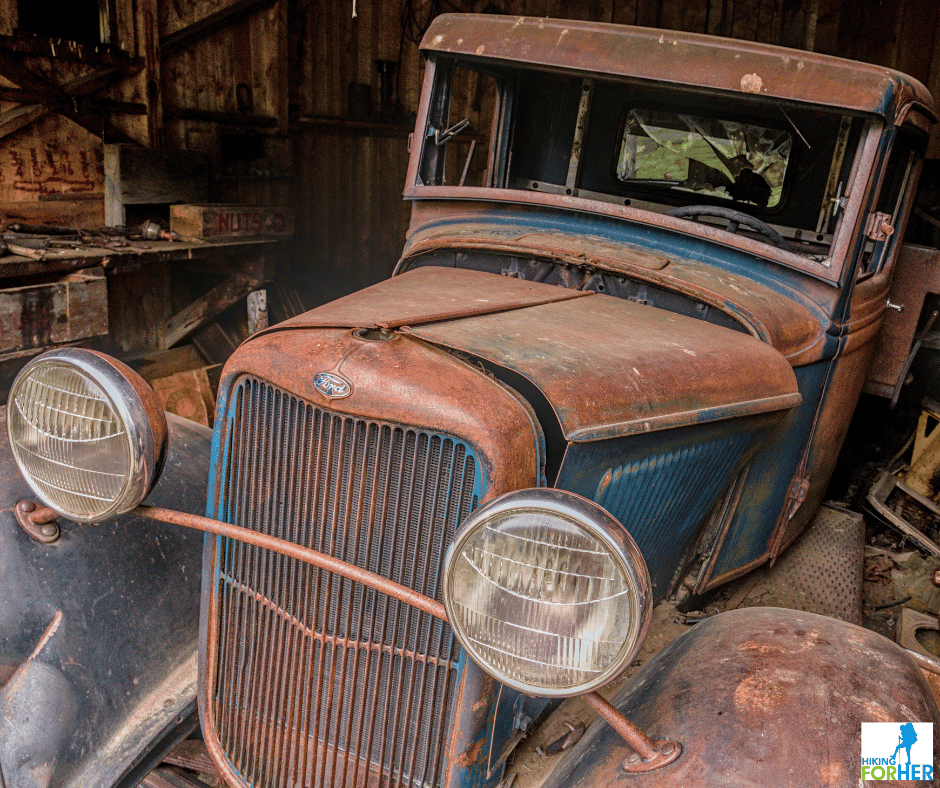 One of the larger mining artifacts at Bremner Mines
Not much else to say about the Bremner Historic District, as we were either locked down by rain and fog or surrounded by grizzly bears.
Not all that sorry to leave, to be honest.
About the bears
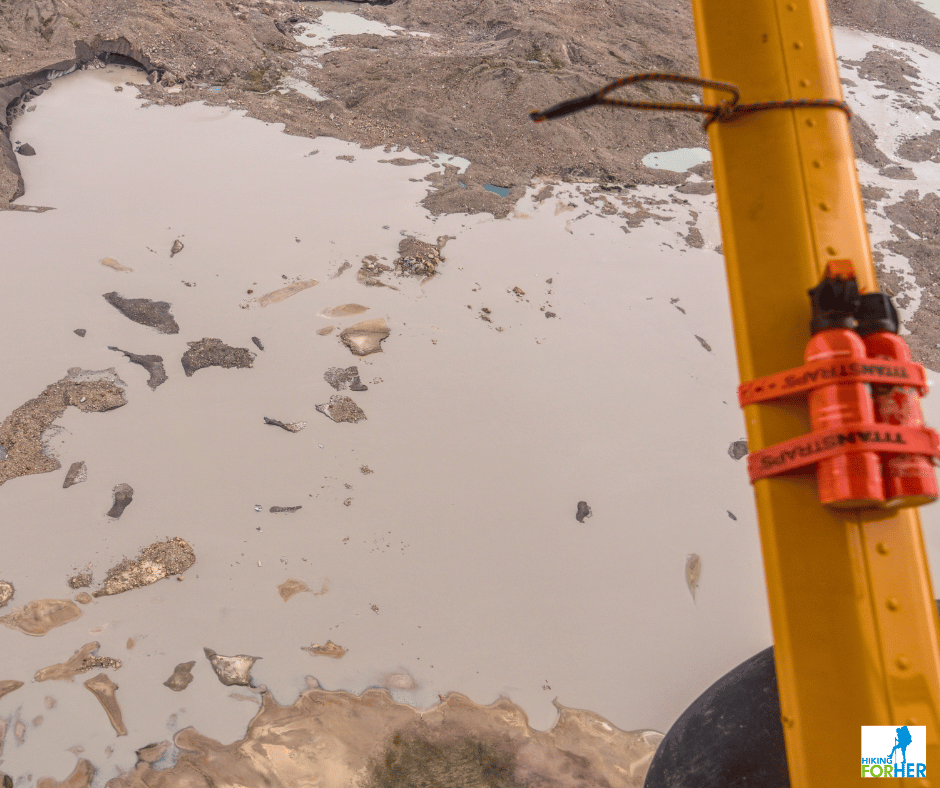 Notice the bear spray lashed to the plane strut as we fly over one of the glaciers.
The Bremner valley is a lush habitat for bears.
The berry bushes were fully loaded during our time there. I, along with all the grizzlies who made themselves available for adrenaline fueled glimpses, enjoyed gorging on the plump little morsels of sweetness.
In the two days we were there, we saw 7 grizzlies from our soggy campsite at the end of the Bremner airstrip.
All of them were more interested in grazing than in us.
This mom and twins were fascinating to watch!
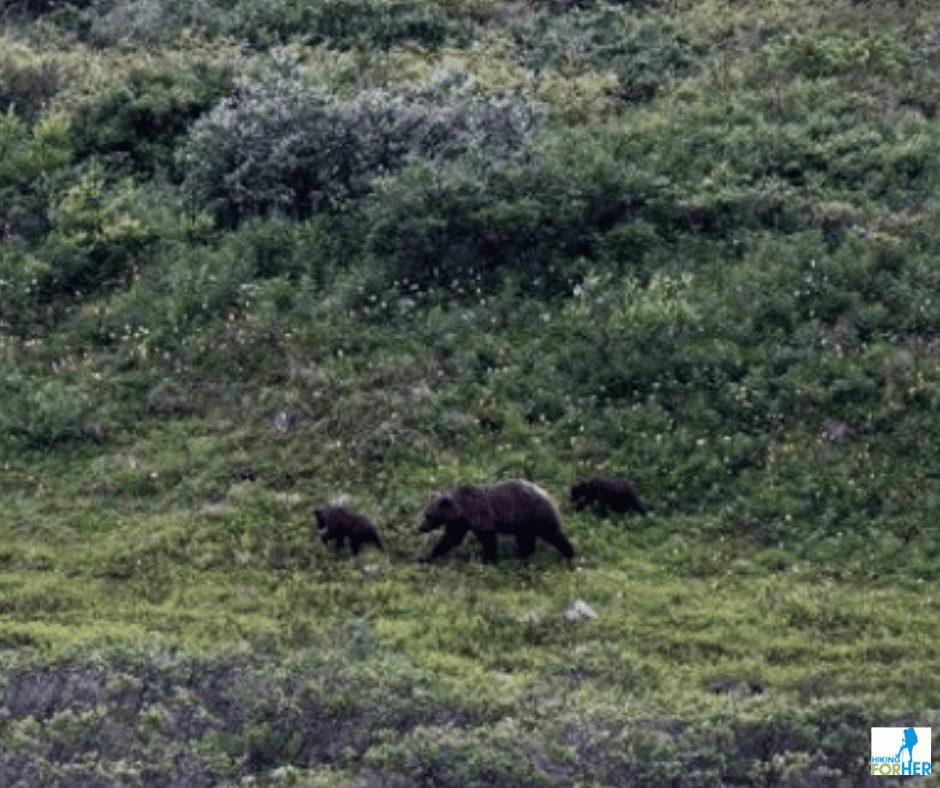
Nevertheless, we practiced good bear aware habits at all times:
- Traveled together in a group of 4.
- Scrubbed out our dishes with sand from the river to remove all traces of food.
- Had bear spray ready to hand at all times.
- Made noise and walked around camp to alert them to our presence.
- Wore our backpacks when walking away from camp to appear larger.
- Tracked the movements of the bears as much as possible to avoid confrontations.
Now, on to our last location in this Wrangell St. Elias hiking trip report!
Fan Glacier
Taking off from the wet and brushy Bremner valley to land on acres of sand required a hard mental reset.
Was that the sun shining through the clouds? The rain gear could get stored for once, what a relief.
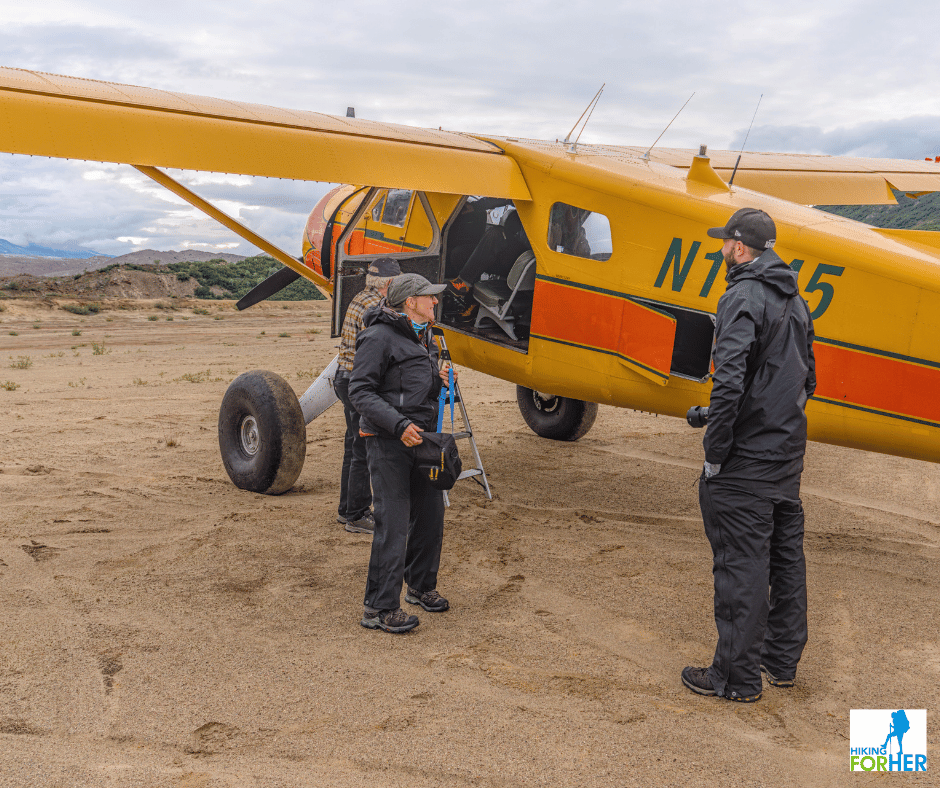 Arriving in all my layers and feeling way overdressed
At first glance the hiking possibilities here were fan-tastic! (sorry, not sorry)
We had tremendous roaming around opportunities in two directions.
Why not four?
Wild rivers cascading off glaciers, like this one, hemmed us in on two sides.
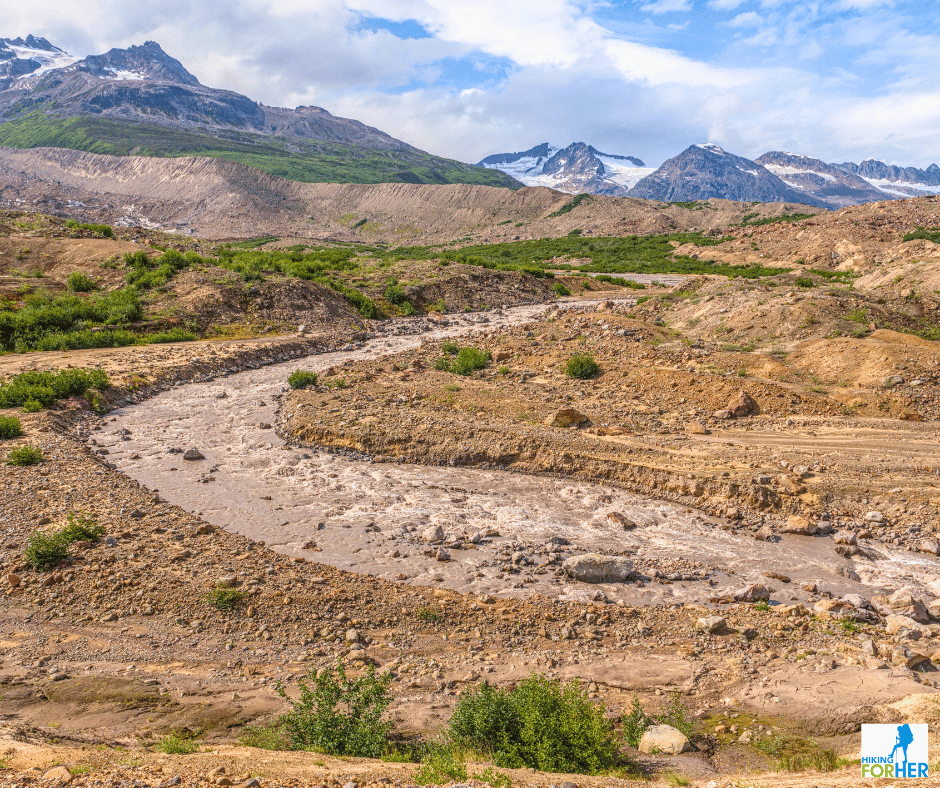 No way you're crossing this raging snow melt!
It turns out, with some persistence and a lot of high calorie snacks, you can get up close and personal with lots of ice!
Here's the terminus of the West Fan glacier, buried beneath rubble, rocks and dirty snow.
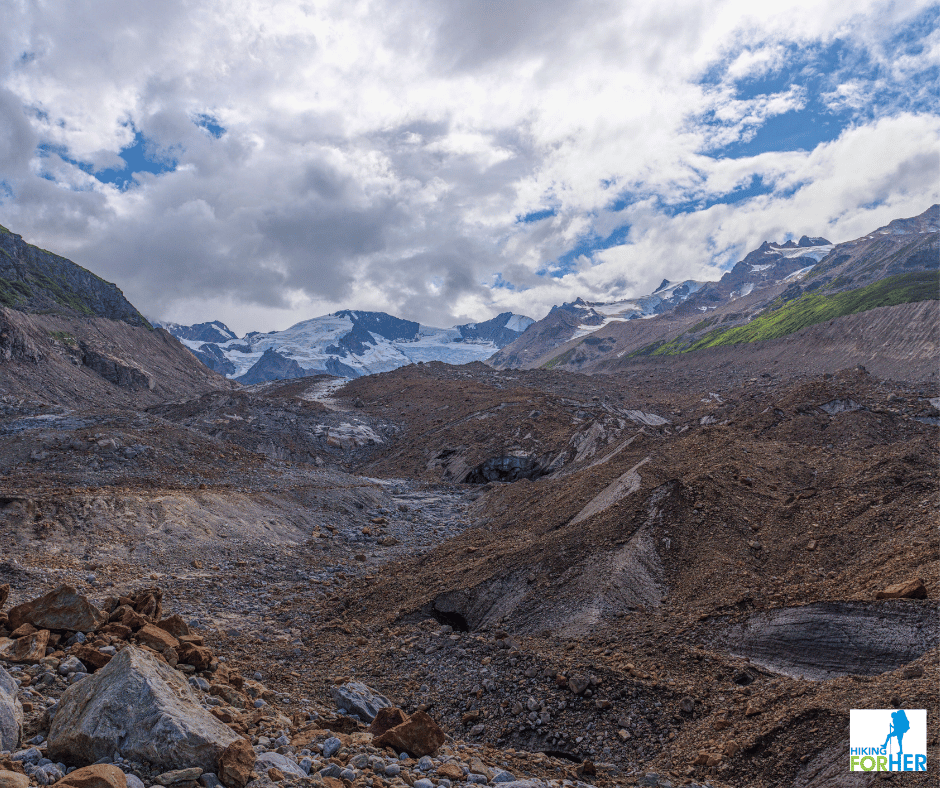 A worthy objective for an all day exploration - how close can we get to that glacier?
And here we are, even closer!
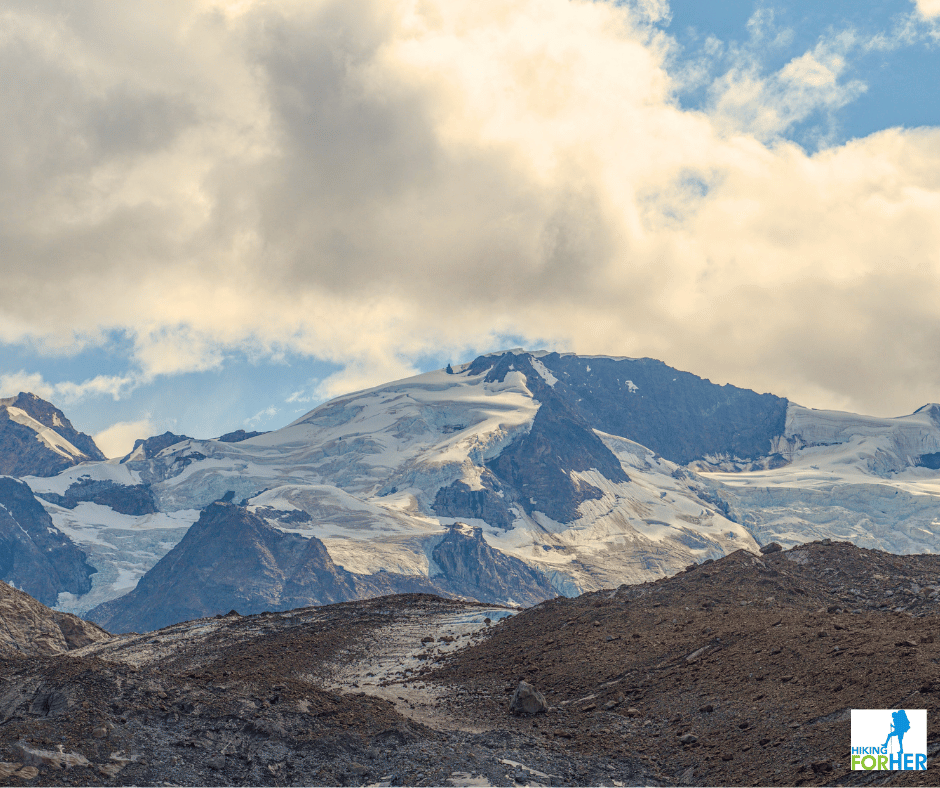 Dramatic sky, rock and ice - a hiker's paradise!
The next day, another morning with clear weather (hold your breath time), we headed in a different direction.
We picked our way across the expanse of sand and hiked up a steep lateral moraine, one rocky and sometimes precarious footstep at a time, until we were here!
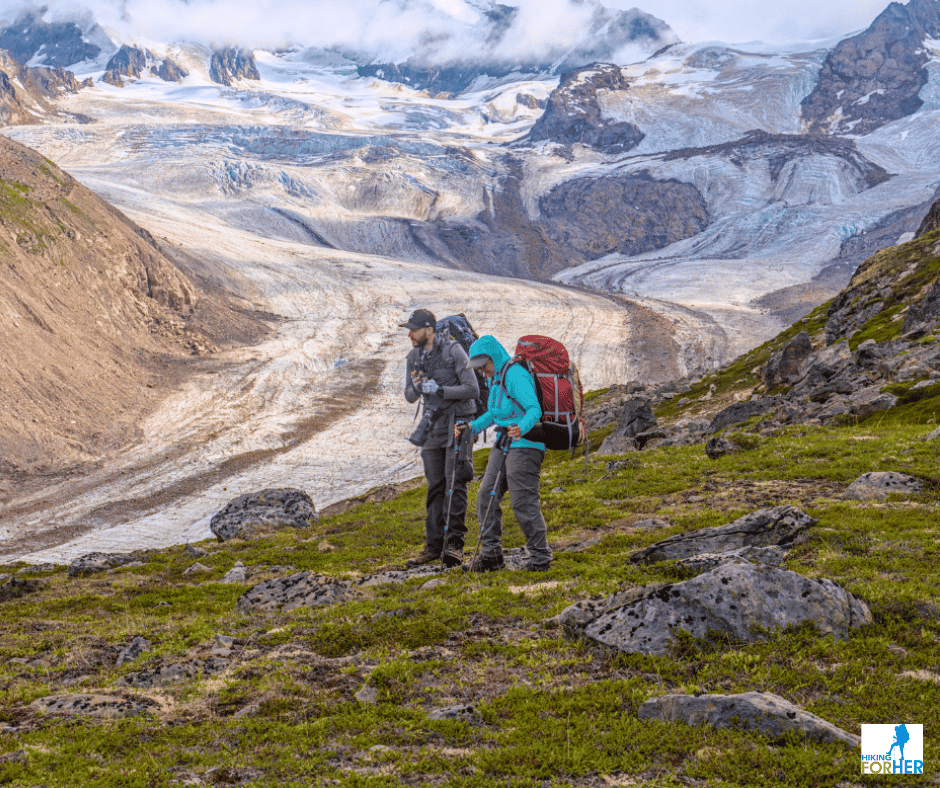 Not a bad lunch spot, wouldn't you agree?
You can't see it in the photo above, but what looks like flat ground is actually just a small patch of greenery at the top of the lateral moraine we used as an access ramp.
We're way above that glacier!
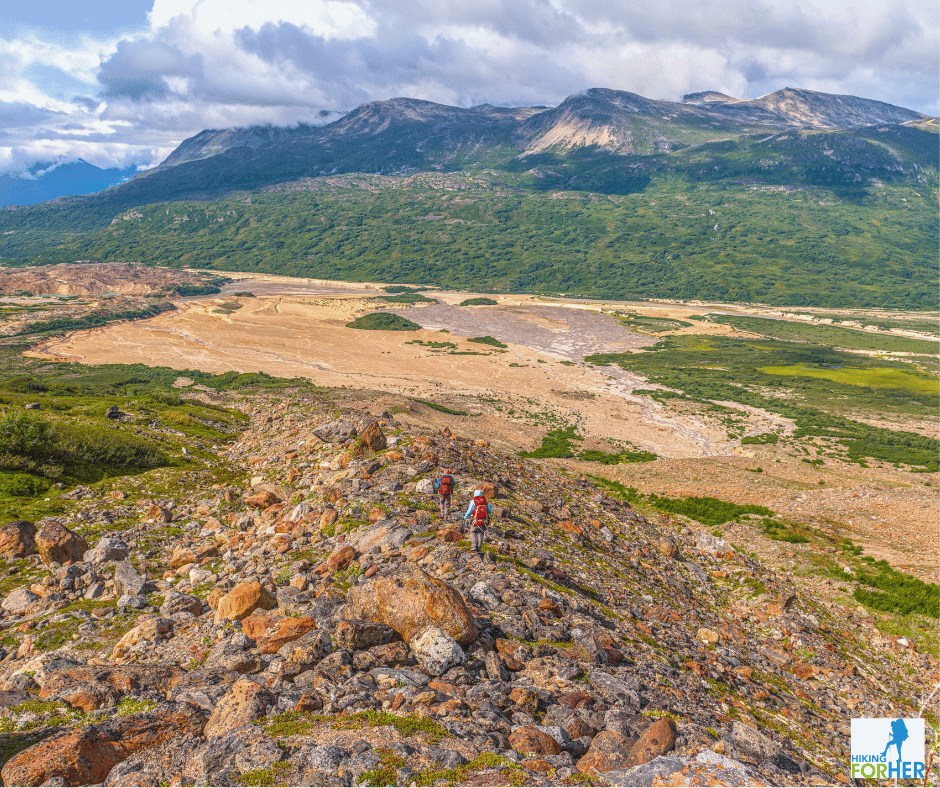 Descending the lateral moraine toward camp, which is to the left of the green turtle in the middle of the sandy fan.
This is a great view of our descent off the moraine. The sandbars, brushy hillsides, braided rivers and dramatic clouds provide a feel for the Fan Glacier site as a whole.
Dun dun dun duh...
And now our story takes a turn for the worse in this Wrangell St. Elias hiking trip report.
Let's begin by focusing on this fact:
- When you camp on a huge sand bar, and fall asleep under clear skies, you had better be prepared to face the music (i.e. wind) the next morning.
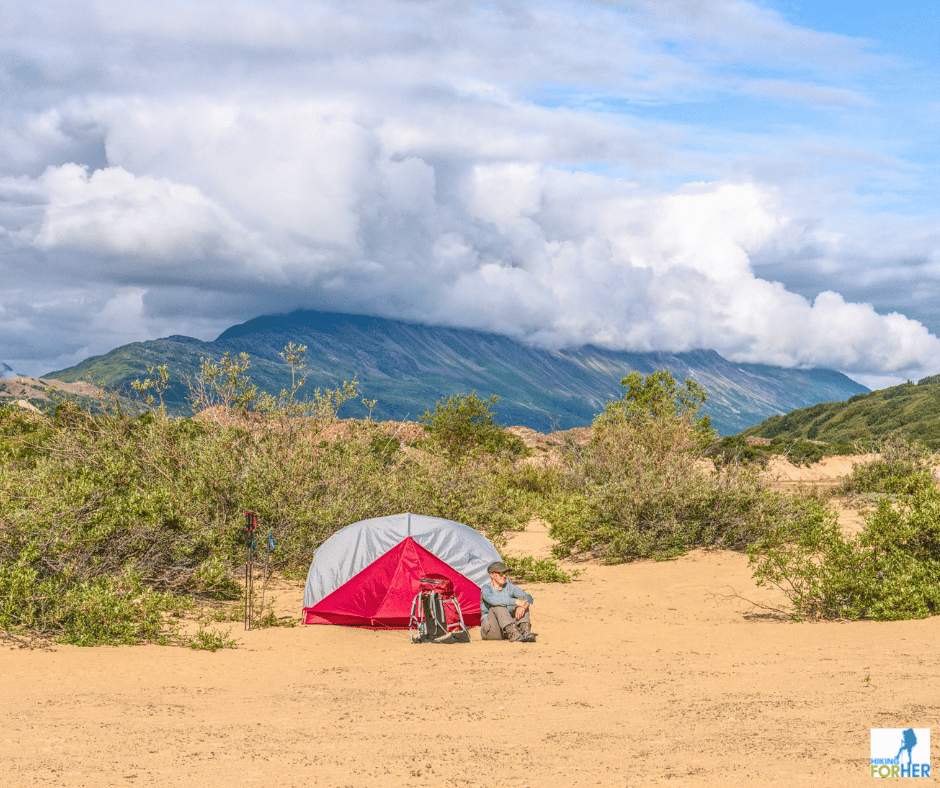 This sand bar makes a sweet little spot to make home (if the wind isn't blowing). Just don't glance over your shoulder!
The "music" included estimated wind gusts of 30mph that ripped one tent fly into pieces, pulled out tent stakes, and sent cascades of sand into every tent.
I'm talking enough sand that you could scrape it off your sleeping bag, and have it fill your cupped palm.
Or pick it out of your eyelashes.
A sandstorm in Alaska?
Yeah, I had never heard of it either. I seriously need a Tshirt that says "I survived a sandstorm in Alaska".
And that tall kitchen tent that had protected us from all the rain at Bremner?
Toast. (sorry)
How long would we have to endure
those sandy blasts?
The sat(ellite) phone news was not good, but not unexpected: too windy to fly.
The advice from the dispatcher: Hunker down and wait.
We became champions waiters!
Too windy to light the stove, too windy to go for fresh water, too dangerous for the eyes and lungs to be outside the tent for more than a quick pee break.
You know what that means!
Peanut M&Ms for breakfast, lunch and dinner.
(Side note: I will never eat another one of them. Plus I have trauma from eating in a tent, a never to be broken Hiking For Her rule.)
It wasn't until 6P that a very brave pilot flew us out, in two trips, in windy gusts that shook the plane like it was tissue paper.
And I quote this seasoned pilot:
"Alaska can be real pretty when it isn't trying to kill you."
So a word of warning if you go to a sandy location.
- Camp in the brush, not on the sand bars.
Last day of the Wrangell St. Elias
hiking trip report: the Root Glacier
After a hot meal, a shower, a good night's rest in McCarthy (and no candy covered peanuts in sight), it was time to explore the Root Glacier.
After an easy 2 mile hike to the jumping off point, we donned crampons and spent all day (in the cold rain) exploring the topography of an active glacier with a knowledgeable guide.
- She even made hot chocolate for us at our lunch stop!
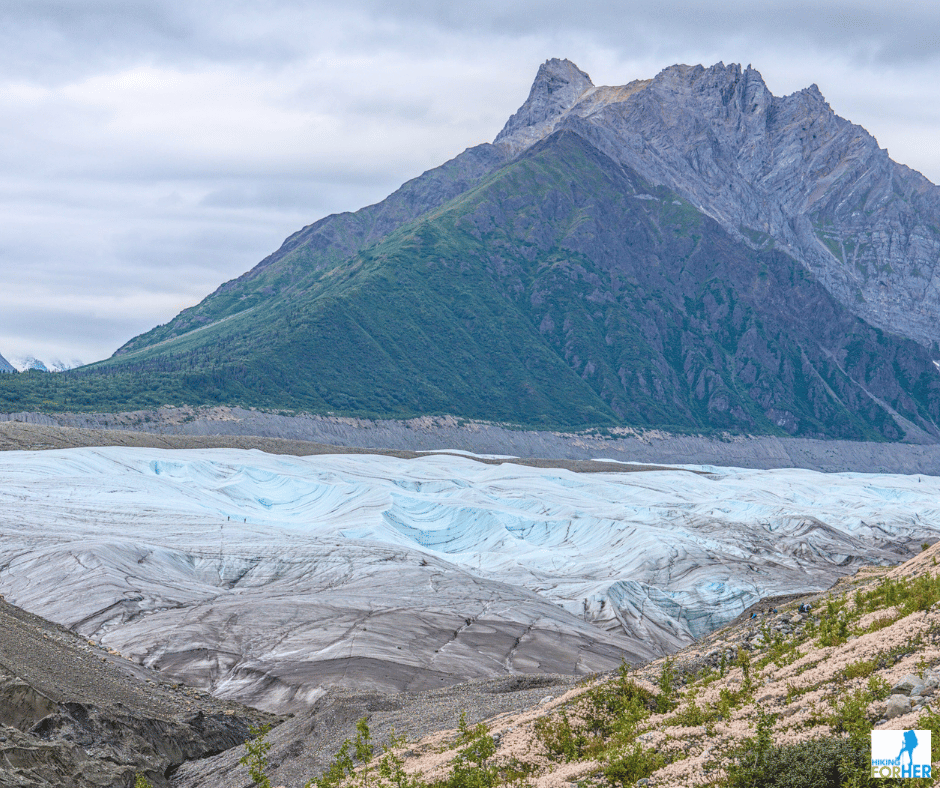 Here's what you see as you start your descent to the lateral morraine of the Root Glacier - plenty of exploration to be had.
Hiking on a glacier means you have to keep your wits about you. Although the crampons keep you upright, it takes a different sort of gait to be sure you don't impale yourself.
For my tips on the vocabulary, techniques and equipment used for dayhiking on a glacier, go here.
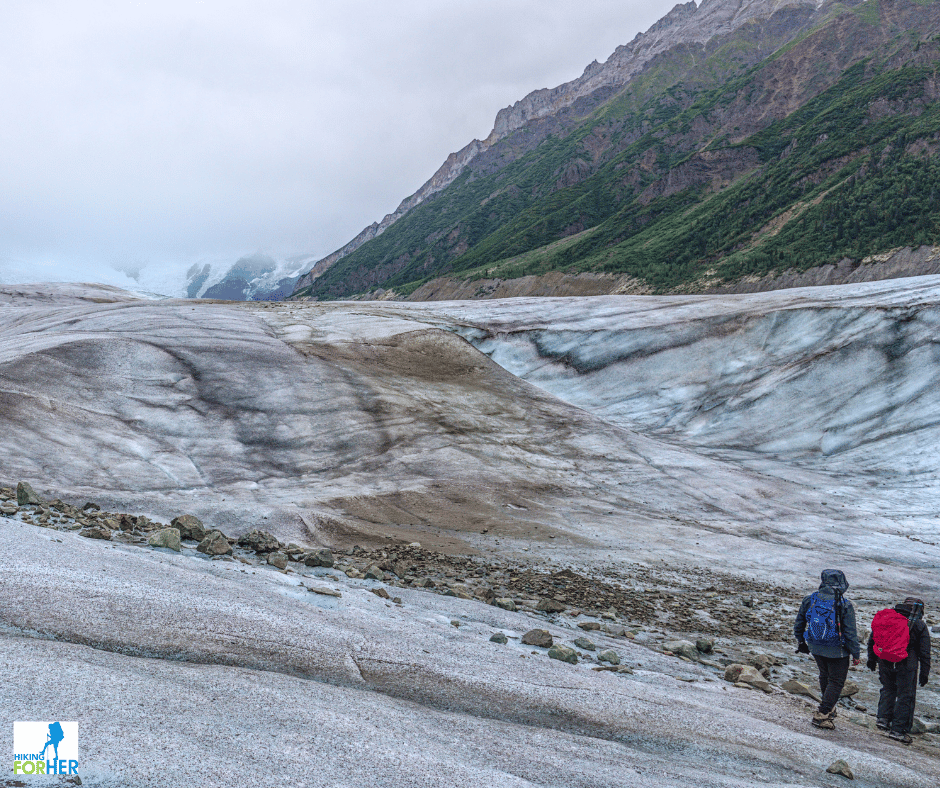 What a great day! Surrounded by ice, pummeled by rain, and loving every chilly minute of it.
Although the sun never did shine that day, we managed to explore a jaw dropping amount of ice locked up in the Root Glacier.
This icefall was particularly impressive!
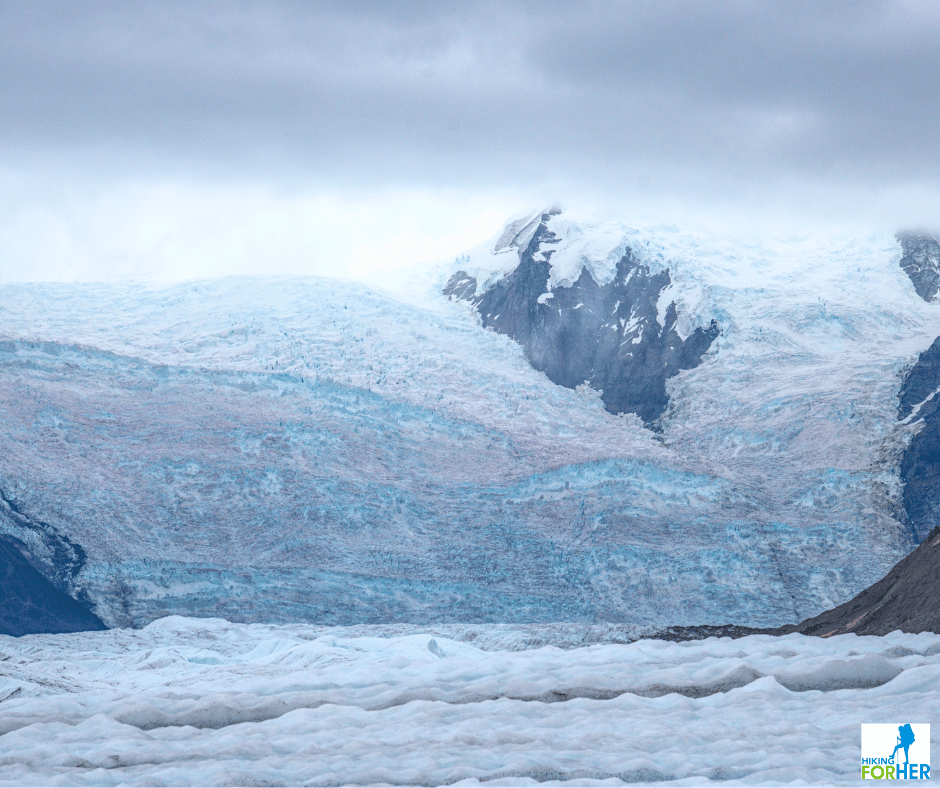 Icefall on the Root Glacier, above the area we were exploring
The next day we boarded two different planes and made it back to Anchorage for our last night in the wonderful state of Alaska.
It took a week back home to adjust to all the comforts of civilization and the pace of our lives.
In fact, it was the hardest part of the whole trip.
The end of this Wrangell St. Elias
hiking trip report
For 2023, that is!
I also explored a different area of the park in 2017, so keep reading or scroll through the photos of this vast wilderness.
July 2017 Wrangell St. Elias
hiking trip report
This Wrangell St Elias hiking trip report is the result of a two week backcountry trip I enjoyed in July 2017.
All of the opinions, comments, photos and information belong to Hiking For Her, and were unsolicited by outside parties.
If you're dreaming of a big hiking adventure, give this a read. There are plenty of opportunities for hikers in this particular corner of Alaska!
Wrangell St Elias hiking trip report:
initial logistics
This trip involves time spent base camping in 3 specific areas accessed via bush plane from the town of McCarthy:
- Skolai Pass
- Nizina Glacier
- Wolverine Plateau
If you need recommendations for a guide or bush plane company, contact me.
Helpful resources for picking locations
The USGS (United States Geological Survey) has a 166 page publication written from a geology perspective but with fantastic photographs: A Geologic Guide to Wrangell Saint Elias National Park and Preserve, Alaska: A Tectonic Collage of Northbound Terranes.
- It's available here.
The USGS also has a map of the area, but it's hard to come by. In fact, it was for sale at the gift shop in Kennecott (a town next door to McCarthy) but nowhere on line.
- Just in case it becomes widely available again, here's the info: Geologic Map of the Wrangell Saint Elias National Park and Preserve, Alaska: Scientific Investigations Map 2877, 2006
One of the few sources of hiking information (destinations, routes, tips) is this Falcon guide to the region.
- Be sure to check out the on line version of it, too.
Wrangell Mountain Air has some recommendations for hikers as well.
- They fly out of McCarthy, and are happy to drop you off in the backcountry and then fetch you back to civilization.
Wrangell St Elias hiking trip report:
gear you need
Hiking in this part of Alaska is a mixed bag in terms of weather and terrain.
If the weather gods smile upon you, it's possible to feel overheated due to the lack of tree cover.
If they don't, you're in for a wet and miserable time of it.
So you need to prepare for both scenarios, with a versatile hiking clothing layering system with top notch rain gear.
- If you're new to that concept, read this.
Another strong recommendation I have is to take a pair of trekking poles, whether or not you routinely use them now.
I used my poles for all of these activities, and was very grateful to have them:
- crossing the uneven, wet surface of muskeg
- probing murky stream crossings for deep holes
- maintaining balance on glacial moraines with tricky footing
- taking pressure off knees on steep descents
- getting leverage when sinking into mud hole
Two weeks of hiking nirvana:
day by day Wrangell St Elias
hiking trip report, 2017
In this trip report, I'll take you through where we were day by day and share the highlights.
Day One: Driving from Anchorage to McCarthy
A bright and early start is recommended, because it's a high mileage day.
Once outside of Anchorage, you're on two lane roads which curve, dip, climb and once in a while beeline while skirting the Chugach mountain range.
The views of mountains and wild raging rivers are stunning and immense.
The gravel McCarthy road offers views of the mighty Copper River and Chitina River that you won't soon forget.
- If you're riding shotgun you will have plenty of spectacular scenery to keep you awake!
Rental car note
An important note about using a rental car to get to McCarthy:
Very few rental companies will allow their cars on the gravel McCarthy Road, and for many good reasons:
- Deep pot holes, corrugated surfaces, wash outs, water over the road, permafrost heaves, swerving around large animals, and more.
Be very sure that you can take your rental car to McCarthy!
A full size spare tire is a great idea, regardless of whose vehicle you're in. There are very few repair services available.
Important tip in this Wrangell St. Elias hiking trip report:
you can skip the McCarthy road altogether
Alternatively, you can fly into McCarthy from Anchorage, Valdez, Chitina and other towns.
The good news: It saves you the trouble of driving for hours, and especially the tedious gravel road driving.
The bad news: It's expensive!
- But maybe not, if you compare the cost of a rental car which has to sit idle near McCarthy while you're hiking.
McCarthy lodgings
Where to stay overnight in McCarthy depends on what you're willing to pay and the experience you're looking for.
On the high end, you can choose the Kennicott Glacier Lodge, which boasts of its views of the Kennicott Glacier (literally just a stone's throw from the front porch), Mount Blackburn, and the Chugach Mountains.
- I stayed there one night on my 2023 trip.
On the budget end, you can camp at the one campground at the end of the road.
Somewhere in between these two extremes was the place I stayed at, the Kennicott River Lodge and Hostel. The main lodge offers a full kitchen, showers, and a common room.
There are also options in downtown McCarthy, from single rooms to an apartment style rental. Most are open from May through August.
Days 2 - 4 in this
Wrangell St. Elias hiking trip report
Bright and early next morning, we shuttled our gear across the river using free trolleys. It was a bit of a walk from our cabin to the bridge.
Wrangell Mountain Air's van picked us and our gear up and dropped us off at the airstrip.
There were lots of flightsee planes lined up, and our gorgeous yellow and red Beaver: room for all four of us, 4 bear canisters, and 4 backpacks.
Off we went!
Skolai was our first stop in this
Wrangell St. Elias hiking trip report
Skolai Pass can be a busy place.
It's a landing hub for backpackers doing the Goat Trail.
- These folks start hiking within minutes of being dropped off, so they can access Skolai Pass by the end of the day.
- Others head over to the Russell Glacier for the night.
Folks like me who are yearning to explore the valley over several days just pitch a tent a ways from the airstrip.
There is fresh water available, and lots
of dry ground.
As soon as the bush plane dropped us off, we set up camp and then grabbed our backpacks, water and snacks. Time to explore!
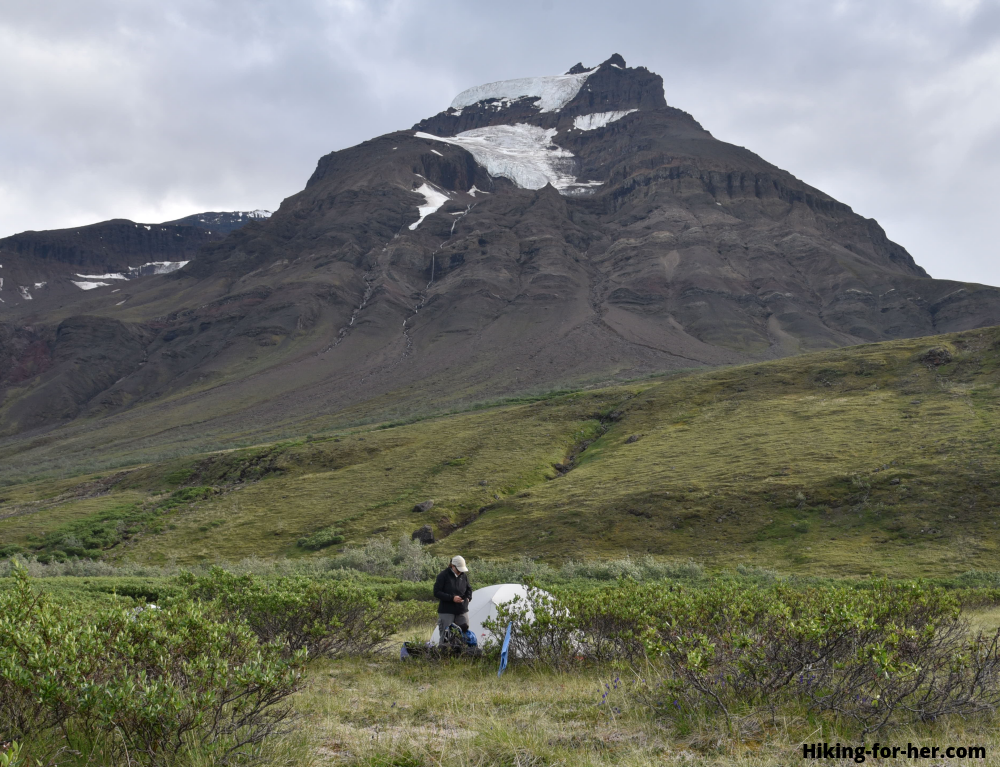 Soft dry ground, the thunder of cascading water, great views in every direction - looks like home to me!
Heading over to the Seven Sisters is a fast way to acclimate to the terrain, because you work your way across the flank of the valley, onto moraine (foreground of picture below), and up to rocky viewpoints of glaciers.
Look at this and tell me you wouldn't love to explore here!!
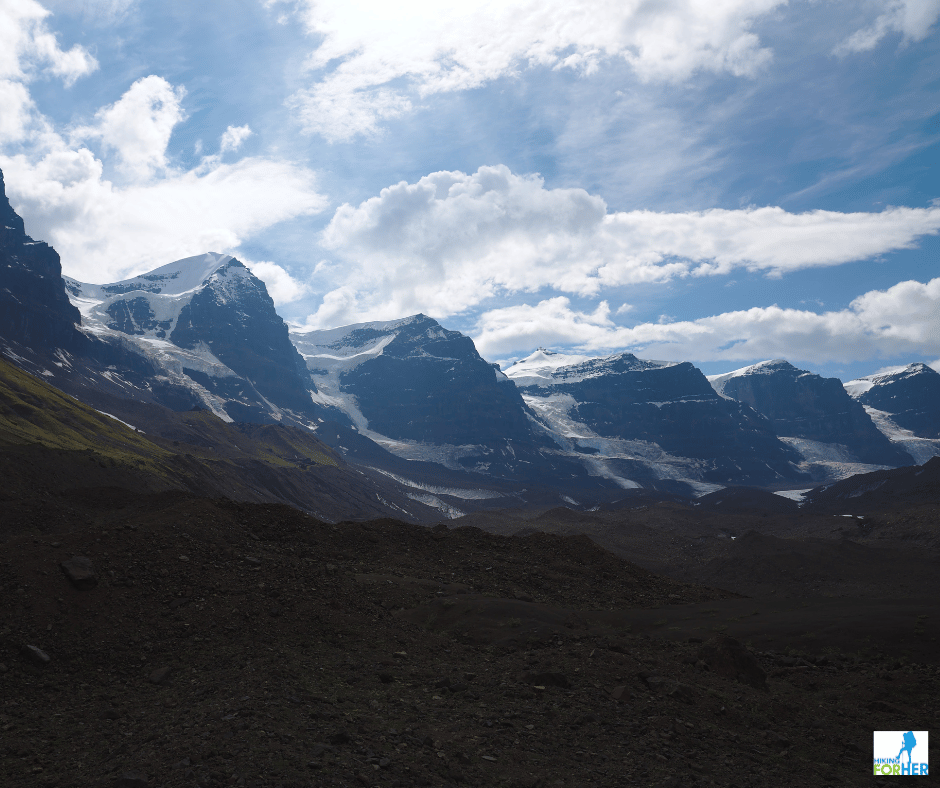 Some of the Seven Sisters at Skolai Pass, up close and personal
The next few days were spent exploring the area near the Russell Glacier at the opposite end of the valley, as well as a canyon across the river and the unnamed mountain opposite our camp spot.
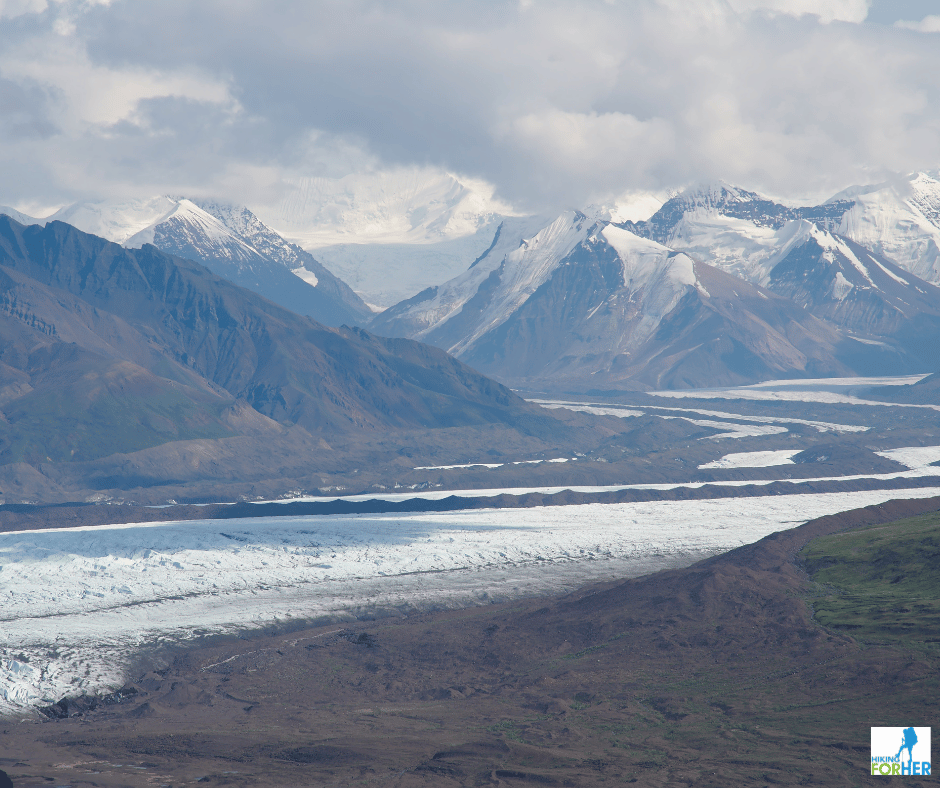 Russell Glacier from overlook, Skolai, Wrangell St Elias
The hiking at Skolai involved a mix of bushwhacking, water crossings, navigating mud and muskeg, scrambling up steep hillsides, exploring rocky canyons, and enjoying the changing light and sky.
Great chance to sharpen up all the hiking skills!
Lots of bear signs, but no bear sightings.
Day 6: Time to head over to Nizina Glacier
The bush plane arrived in the morning and we loaded up our gear for a short flight over to Nizina.
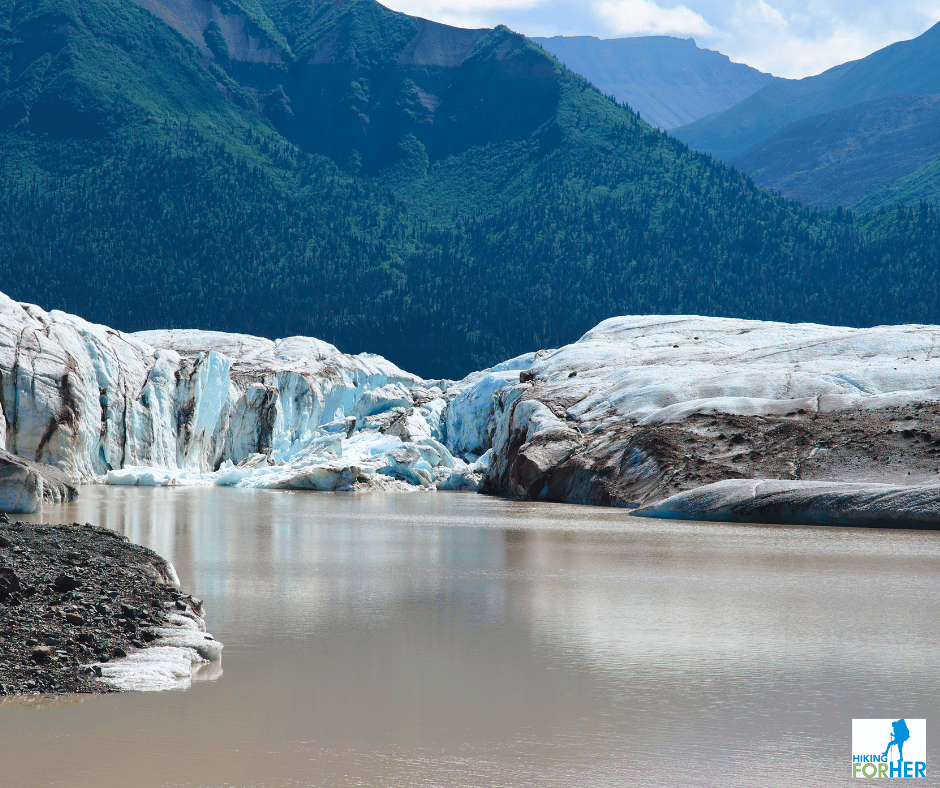
Our camp spot was on a bench above the lake formed at the toe of the Nizina Glacier, with our very own ice chunks calving off into the waterfor entertainment.
Days 6 - 8: Nizina hiking
in this Wrangell St. Elias hiking trip report
This area is low and brushy, with the river cutting through the valley.
The lake is dotted with picturesque ice chunks, and the glacial flour (ground up rock debris) gives the water a gorgeous turquoise hue.
- If you're into packrafting, the lake and the river at its outlet beckons.
There is an historic cabin near the landing strip, recently restored and somewhat difficult to access in the summer due to brush and mud.
It's filled with interesting artifacts and makes a great place to duck out of a rain shower (if you like dank, dark holes).
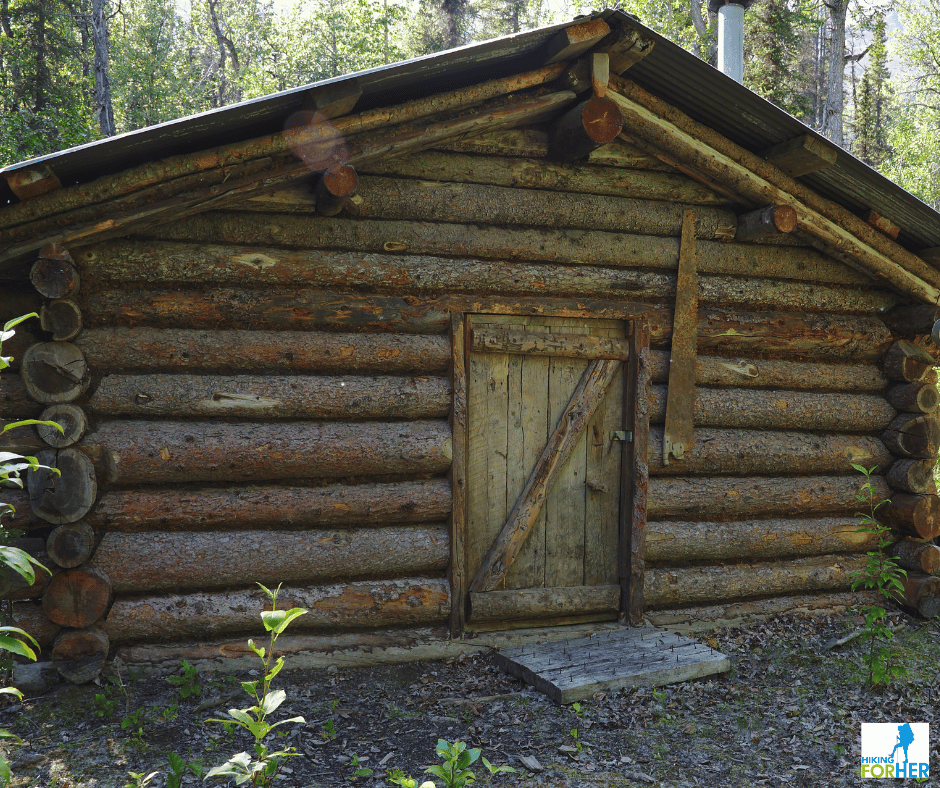 This cabin has passed the test of time!
We decided upon two hiking destinations at Nizina:
- Amphitheater Creek
- Nizina Glacier
Amphitheater Creek
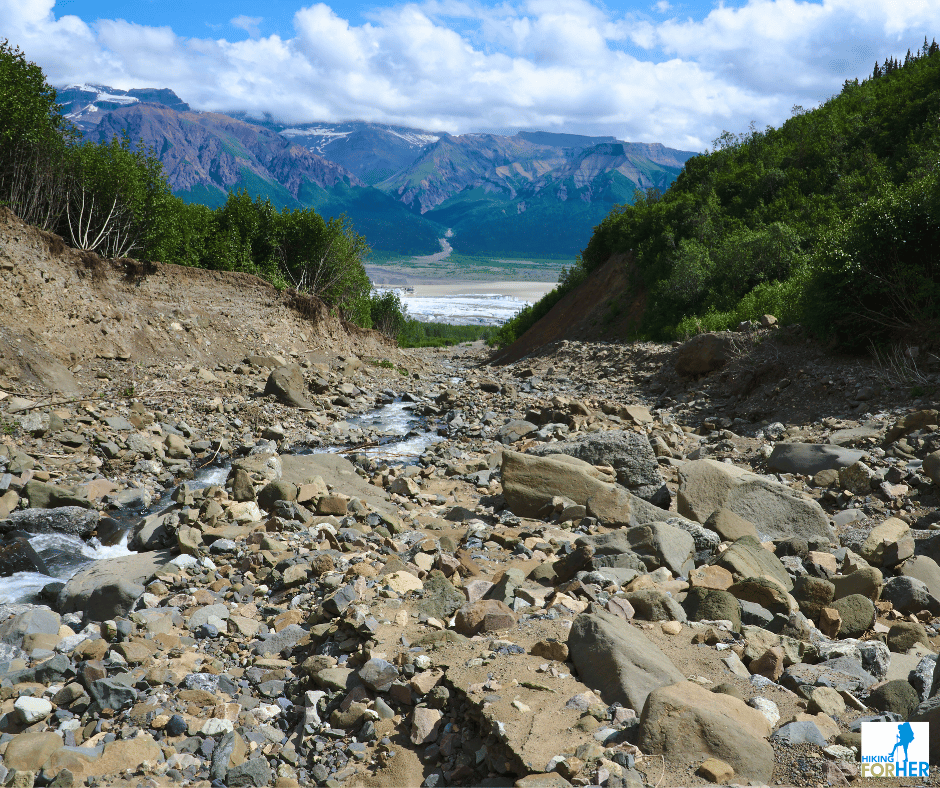 Rock hopping, anyone? You can see across Nizina Glacier from here.
There was a sketchy (perhaps imaginary) trail along the lake bank to follow until we got to the creek.
Then we enjoyed hours and hours of crisscrossing, back and forth for the best route, until we got pinched out by a narrow gorge blocked by huge boulders.
A fun way to spend the day!
Hiking on Nizina Glacier
The glacier hike was another story altogether, too long for this Wrangell St. Elias hiking trip report.
You can see photos and get glacier hiking tips here.
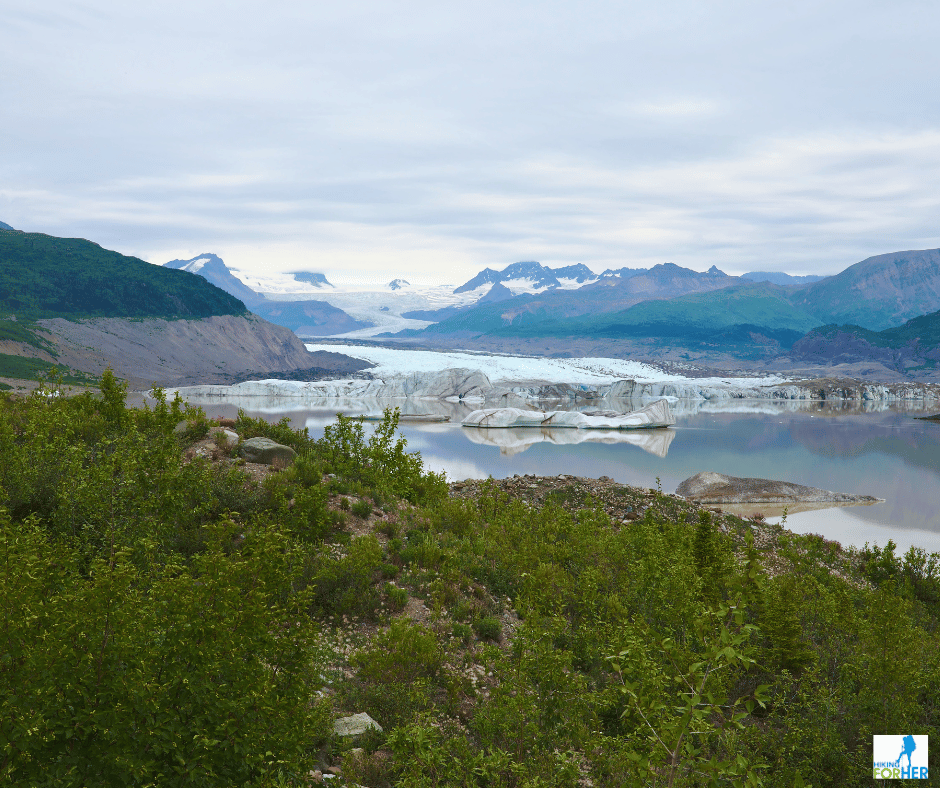 Nice perspective of the brushy approach to Nizina Glacier and Lake
Day 9 - 11: Wolverine Plateau
This spot was a huge contrast to our previous two hiking spots.
Wolverine sits on top of a lofty plateau and its landing strip is near the edge of a sheer vertical cliff.
- Makes for an exciting approach, and an even more exciting take off!
- Fingers crossed for no wind that day.
The terrain is drier and marked by deep ravines, cutting you off from easy passage to your destination.
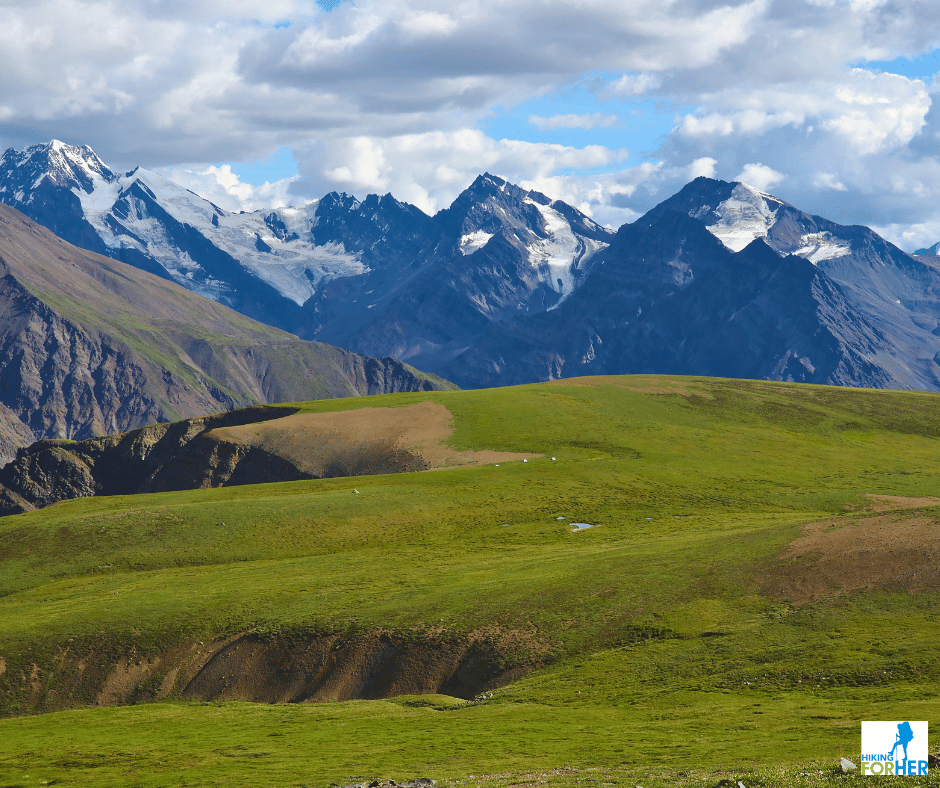 You can see our cluster of three tents, and the kitchen tent way off to the left by itself. Good bear awareness, even on this high plateau!
Thus, the hiking requires patience and good balance (and your trekking poles).
You can go cross country (which we did) or you can head uphill (which we also did).
- Can't go wrong, good views in all directions down into the river valley or across to more peaks.
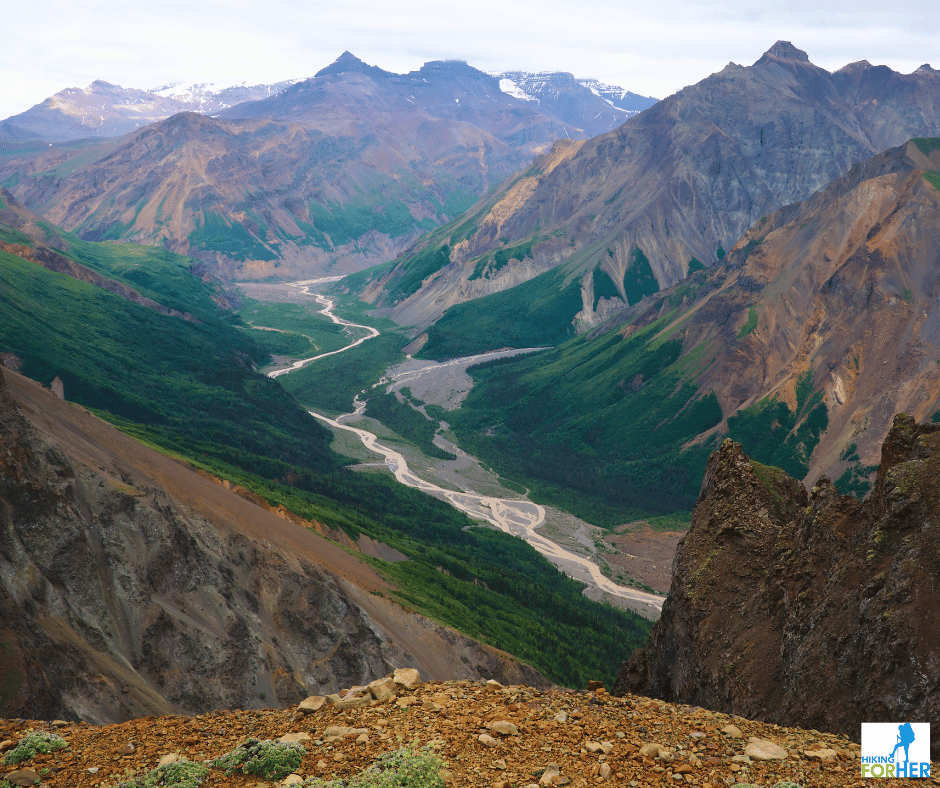 A peek into the Chitistone Gorge from the Wolverine Plateau
This place was tough to leave. It had 360 degree views, good access to flowing water, plenty of exploring options, and you could entertain yourself by lying on your belly and looking over into the gorge.
However, a ferocious windstorm the night before we left convinced me that maybe this wasn't the best place to linger, given how exposed we were.
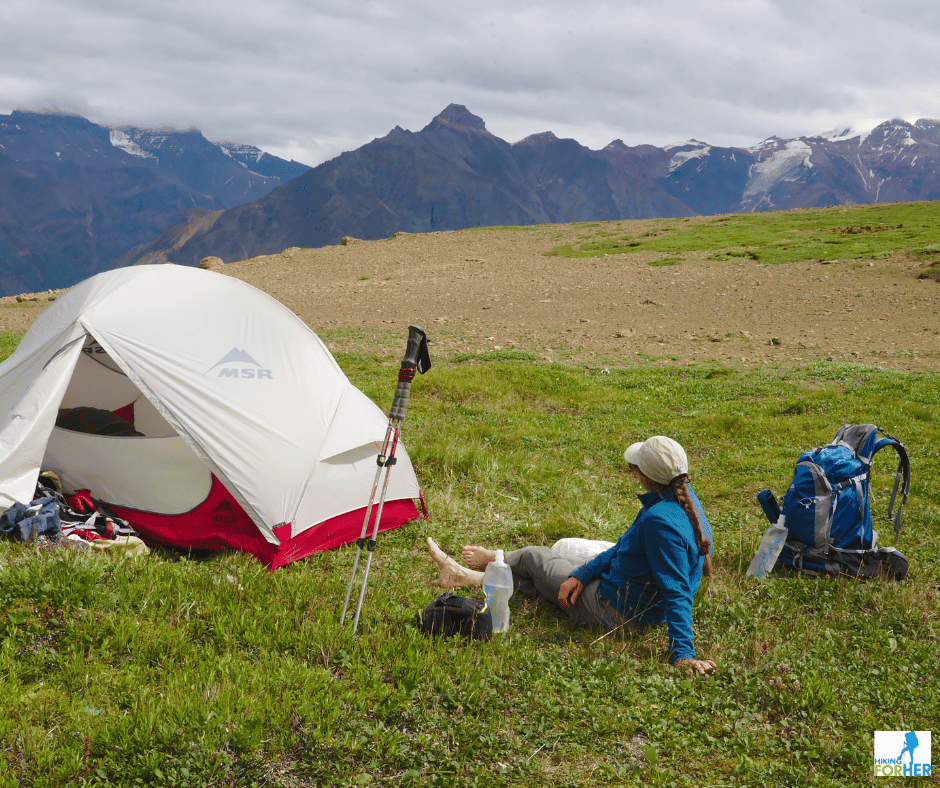 Ah! The moment when the boots come off. And the view ain't bad, either.
A gear note in this
Wrangell St. Elias hiking trip report
Your tent means everything in an Alaskan windstorm. There is nowhere else to go to get out of the sometimes savage weather conditions.
So take a good tent with you.
I rely on my MSR HubbaHubba and MSR Elixir 2.
They have proven worthy in downpours, bug assaults, and most importantly, massive and long lasting windstorms.
Their footprints have given them a long life, regardless of how much sand and grit I throw at them. Worth the extra weight every time.
Also, they're easy to set up and tear down.
That becomes important when you don't want to get out of your tent until the bush plane can be heard droning overhead (as in sandstorms).
Last day in this Wrangell St. Elias hiking rip report:
Back to the little town of McCarthy
Wolverine is notoriously windy later in the day, so we had an early morning flight scheduled.
Thus, we arrived in plenty of time to explore the Kennecott mining site. I highly recommend one of their guided mining tours, taking you through the entire town and partially restored mine building.
You can do a self-guided tour of the town site, but paying for a guide gives you access to the mine building plus lots of historical facts you might not get on your own.
A few tips to maximize your time
in McCarthy and Kennecott
McCarthy safeguards itself against a lot of tourist traffic.
- There is a foot bridge that non-locals use to cross the river. Yup, you will be walking to town if you have lodgings on the far side (about half a mile).
- Only locals can drive cars in town, using a tolled bridge further down the river.
- There is a shuttle van running every half hour from the footbridge to town, and also over to Kennecott (there is a one way per person fee), holding around 13 people per trip.
- Cell phone coverage is limited to one company that starts with a V; everyone else is out of luck.
All of this adds up to an interesting rustic experience!
Be sure to bring your camera, because moose and bear sightings - in town!! - are common.
And about those dogs...
McCarthy is devoted to its dogs.
They wander around freely, lie down in the middle of the road, sit near restaurant doors and look forlorn, bustle around in small packs, and absolutely ignore humans.
Every size, shape and color of canine is represented, and locals swear that every dog has a name, and thus an owner.
From what I saw, these dogs are in full control of their own destinies.
No leashes for them! No commands to sit or stay, either.
You might be a bit hesitant at first when you see these dogs trotting toward you on the footbridge.
Or basking on the porch steps of the restaurant you want to enter.
- No worries, they are mellow creatures and deeply devoted to their full on pursuit of dog happiness.
- Humans? Who cares!
- Just step around them.
Note: No photos of McCarthy dogs are included in this Wrangell St Elias hiking trip report because I was unable to get permission from those independent minded canines. They prefer their privacy.
Be prepared for this!
Nothing happens fast in small Alaskan towns.
So if you show up with a Type A personality and fret about why the plane is delayed (could be due to weather, parts, indisposed pilot) or grouse about when it will stop raining (it may not), you're going to stick out like a sore thumb.
Slow and easy is the way to approach a Wrangell St Elias hiking trip.
- Enjoy the ride!
- There's nothing to conquer :)
Seriously, that's probably the best tip I can give you in this Wrangell St Elias hiking trip report.
Questions about this Wrangell
St Elias hiking report?
I'm happy to answer questions about how to get into this fantastic hiking playground, and what to do once you've arrived.
- Contact me here.
Also, take a peek at my gear list.
Wrangell St Elias Hiking Trip Report
Some of the links may take you to my trusted affiliates, companies I've used and know to be reliable for hikers. You pay nothing extra.
|
I get emails all the time about what I wear, eat, carry and love to use on the trail. That's
why I provide affiliate links to you: the best gear that I use myself and have seen used by other hikers is instantly
available for your consideration, and the gear company sends a few
pennies per dollar to this reader-supported hiking website. There is no added cost to you! Everyone ends up a winner: Great gear for you, strong gear companies, and more free hiking tips for everyone. Thanks very much for your support. It's warmly and sincerely appreciated. It also helps send these hiking tips to all your virtual trail buddies around the globe. |
 |
