Best Blister Treatment Tips
For Hikers
By Diane Spicer
Blister treatment for hikers is serious business.
Your feet are your ticket onto the trail.
And back home again.
If you're in pain from a hiking blister on your foot, you're not hiking.
Read this for blister prevention strategies, which is the smartest approach to guarding your trail time.
Read on to discover treatment approaches once you've got a hiking blister, and learn whether or not to pop that painful bubble.
- Should I pop a blister or not? can become an all consuming question on a backpacking trip! The right answer is important.
Correct treatment of a blister
requires a little planning
So you've developed a blister on your toe from all that walking.
Don't be the hiker who moans in pain and wishes for blister treatment supplies.
Instead, be the hiker who whips out a well stocked blister treatment kit, including equipment to drain a blister and to apply an ointment in a hygiene manner.
What to put on those blisters
on your feet?
Your blister treatment supplies should be kept together in a water repellent, lightweight but durable bag.
- Flimsy plastic bags won't cut it, because you want these materials to stay clean and dry.
A blister kit also requires lightweight scissors and tweezers, although these might already be in your well stocked first aid kit.
- If not, stash them in this kit.
Also in your bag should be some sort of material to prevent further friction, along with something to deal with discomfort.
Moleskin is a tried and true approach to blister treatment because it's easy to apply.
- Note that moleskin provides a way to cut down on the rubbing from your boots, so take the time to carefully craft your custom shaped moleskin.
To step things up a notch in terms of combating blister pain, try the approach of gel bandages like these.
And to combine the magic of a gel barrier with the additional barrier of moleskin, get this Blister Medic kit.
- It includes alcohol prep pads and antiseptic towelettes to ward off infection from trail dirt (stings like the dickens but cuts down on a chance of infection).
- These items should be in your kit, regardless of which approach you go with.
To pop a blister, or not?
A blister treatment dilemma
There are pros and cons to popping a blister.
The short story:
- If you're on a short hike, the blister is small, and the skin is intact, don't.
- If you're out for several more days, maybe you should.
As you ponder whether or not to pop your hiking blister, consider:
- Will popping the fluid filled blister increase the pain level? (for a large blister, it might)
- Will popping it set me up for an infection? (if you're a few days into a long backpacking trip, it might)
If you're going to pop it...
Once you commit to popping it, be sure you're clean about it in order to reduce risk of infection.
- Wash your hands, and the blistered area, before you begin. Hand sanitizer will sting!
- Have all of your supplies handy so you're not digging around in your kit.
- Put the blistered foot on a clean surface such as an unused hiking shirt.
- Use your rubbing alcohol, pre-moistened wipes, or soap and water, to clean the area.
- Make a small hole with your clean instrument.
- Allow fluids and pus to drain onto a clean tissue or paper towel. Dispose of this in a zipped plastic bag.
- Act quickly and methodically to decrease the amount of time the blister is exposed to the air. A thin coating of petroleum jelly will decrease the pain level from your minor surgery as well as the air currents.
Trail tips:
If your immune system is in question due to age, medical conditions, or prescription medications, consider applying a dab of topical antibiotic along the edge of the blister and across its diameter.
Trail dirt can have any number of microbes lurking within.
Don't ignore signs of infection such as swelling, pain, red streaks leading away from the blister, pus or warm skin around the blistered area.
Why a blister forms
Just so you know, the devilish triad of blister formation is heat - friction - moisture.
- Hot, sweaty feet trapped in your trail footwear
- Friction between socks and boots
Blisters develop from inattention and the wrong stuff on your feet.
If you've taken the blister prevention tips to heart, you've done everything you can to deprive this triad of its evil intention of separating layers of your skin:
- you are wearing closely fitted, moisture wicking socks,
- you've chosen trail foot wear that doesn't pull or push or strain your feet,
- You remove socks and footwear at least once during a hike,
- you know to jump on hot spots IMMEDIATELY by cooling down the area with snow or cold water.
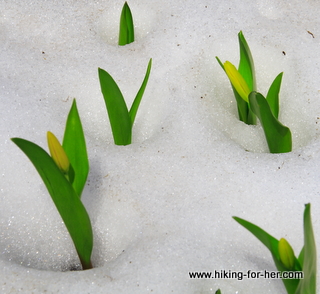 You'll be wishing you were these glacier lilies in the cold snow if you have blisters on your feet!
But whatever you do...
... don't ignore hot spots on your feet.
Why treat a blister when you can prevent it?
A few trail tips:
Stop immediately if you sense pressure, heat or discomfort anywhere on your feet.
Reduce friction on your hot spots with sock adjustments.
If your toes feel extremely hot, squashed or uncomfortable, try loosening your laces.
- Or consider a different boot lacing strategy.
If you're wearing two pairs of socks, take one of them off to see if that helps.
- Or makes things worse.
If your heel is developing a red, hot area, put moleskin or Leukotape on it right away before it deepens.
- You do NOT want to hike back to the trail head in escalating pain.
- Take the time to do a good job preventing additional friction with a barrier like this.
Feeling the pressure and heat?
Sometimes it's your trail buddies, urging you to keep going no matter what.
Too bad!
Your blisters will slow down everyone sooner or later if they are not dealt with pro-actively (and protectively).
So step off the trail, get out your treatment kit, and take care of your precious feet.
Tell 'em Hiking For Her said so!
And use these hiking foot care tips to make sure your feet stay in top shape all season long.
Home page > Best Hiking Tips >
Best Blister Treatment Tips
|
I get emails all the time about what I wear, eat, carry and love to use on the trail. That's
why I provide affiliate links to you: the best gear that I use myself and have seen used by other hikers is instantly
available for your consideration, and the gear company sends a few
pennies per dollar to this reader-supported hiking website. There is no added cost to you! Everyone ends up a winner: Great gear for you, strong gear companies, and more free hiking tips for everyone. Thanks very much for your support. It's warmly and sincerely appreciated. It also helps send these hiking tips to all your virtual trail buddies around the globe. |
 |
